Leaf Blower Pull Cord Repair: Step-by-Step DIY Guide
Leaf blower pull cord repair is a common task that many homeowners can confidently undertake to restore their equipment’s functionality without resorting to costly replacements. Whether your pull cord has snapped, won’t retract, or feels stuck, this comprehensive guide offers expert insights and practical steps to get your leaf blower back in action. Written by a small engine repair specialist with years of experience, these instructions emphasize safety, precision, and reliable techniques.
Before diving in, remember to always disconnect the spark plug and wear protective gloves and eyewear to prevent injury during repair. This guide covers diagnosing the issue, preparing your tools and parts, repairing the pull cord and recoil spring, troubleshooting, and tips for maintenance and when to seek professional help.
I. Introduction: Get Your Leaf Blower Back in Action
If you’re staring at a leaf blower with a broken or stuck pull cord, you might be tempted to buy a new unit. However, most pull cord problems stem from wear or mechanical issues that can be fixed with some patience and the right approach. This guide walks you through the entire repair process, including how to handle the tricky recoil spring tension, ensuring your leaf blower operates smoothly again.
Leaf blower pull cord repair is not just about replacing a rope; it’s about restoring the recoil mechanism that ensures your starter rope retracts correctly and provides the necessary tension for easy starting. By following these steps, you’ll save money and extend the life of your equipment.
II. Diagnosing the Pull Cord Problem: What Went Wrong?
A. Identifying the Symptoms
Before repair, pinpoint the specific problem with your pull cord:
- The cord has snapped or is frayed.
- The cord pulls out but doesn’t retract.
- The cord is stuck and won’t pull.
- The cord pulls freely with no resistance.
Each symptom points to different mechanical issues within the recoil starter assembly.
B. Common Causes of Pull Cord Failure
Understanding the root cause helps target your repair efforts:
- Frayed or Broken Cord: Usually due to repeated use and abrasion.
- Recoil Spring Issues: The recoil spring either uncoils/breaks, causing no retraction, or jams/seizes, causing the cord to stick.
- Starter Pawl or Rope Guide Damage: Less common but can prevent the starter from engaging properly.
C. Crucial Pre-Repair Check: Is Your Engine Seized?
Before investing time in pull cord repair, verify that the engine itself is not seized. If the engine won’t turn over, fixing the pull cord won’t help.
To check:
- Remove the spark plug.
- Try to rotate the flywheel by hand.
- If it won’t budge, the engine is likely seized due to issues like hydraulic lock or internal damage.
In case of a seized engine, professional repair or replacement is typically necessary.
Visual aid suggestion: An image showing spark plug removal and flywheel rotation check would clarify this diagnostic step.
III. Essential Tools & Replacement Parts You’ll Need
A. Tools
Prepare these to streamline your repair:
- Socket wrench set (with appropriate sockets for recoil housing bolts)
- Screwdrivers (flathead and Phillips)
- Needle-nose pliers
- Utility knife or sharp scissors
- Lighter or heat source (for sealing cord ends)
- Protective gloves and safety glasses
B. Replacement Parts
Choose the right parts for your repair:
- New Starter Rope: Match diameter and length to your original or consult the manual. Nylon or polyester ropes are recommended for durability.
- Optional: New recoil spring or complete recoil starter assembly if damaged.
Purchase genuine or high-quality parts from trusted suppliers or authorized dealers to ensure compatibility and longevity.

IV. Step-by-Step Leaf Blower Pull Cord Repair Guide
A. Safety First!
Always start with safety:
- Disconnect the spark plug wire to prevent accidental starting.
- Ensure the engine is cool before handling.
- Work in a well-ventilated area.
- Wear gloves and safety glasses to protect against sharp parts and recoil spring tension.

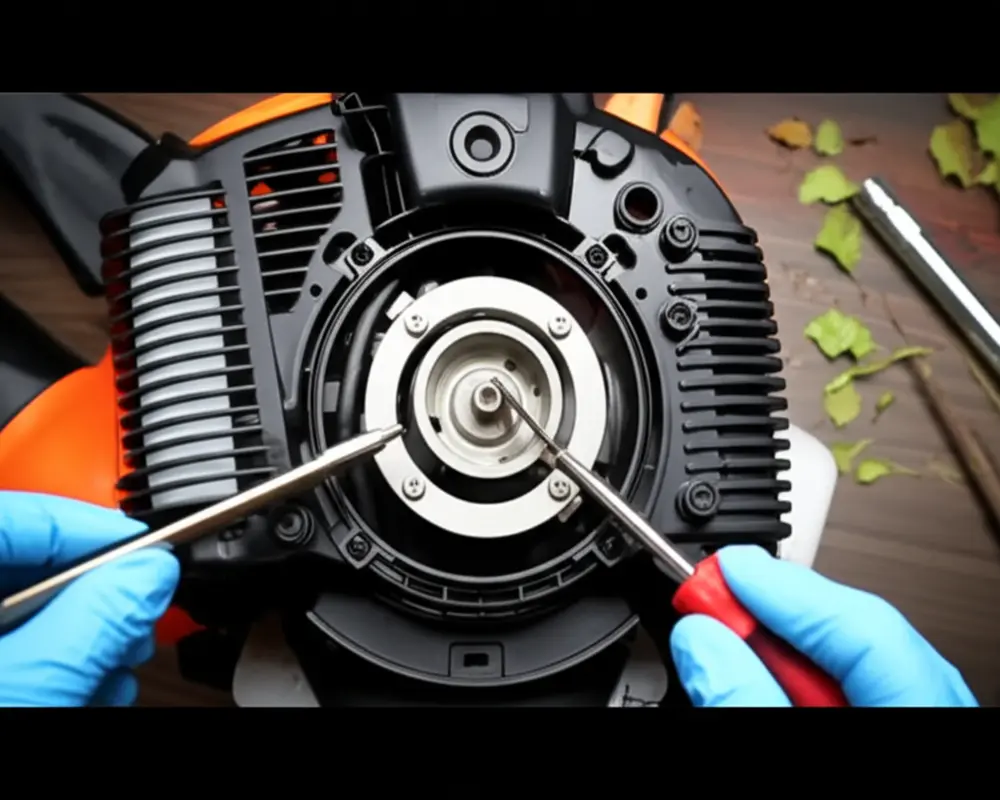
B. Accessing the Recoil Starter Assembly
Follow these steps:
- Locate and remove the engine cover or shroud by identifying and undoing bolts or screws.
- Unbolt the recoil starter assembly from the engine block, noting its orientation for reassembly.
- Inspect the assembly for visible damage such as cracks, worn pulley grooves, broken pawls, or damaged springs.
Visual aids: Use clear images showing the fasteners and removal procedure to guide the process.
C. Removing the Old Cord & Preparing the Pulley
Prepare the assembly for the new cord:
- Cut and remove any remnants of the old rope.
- Inspect the pulley for damage or wear, especially in the rope groove.
- Clean out dirt, debris, and old cord fragments from the housing.

D. The Critical Step: Winding the Recoil Spring Tension
The recoil spring provides the tension needed to retract the starter rope. Proper winding is essential for functionality.
Understanding the mechanism: The spring coils inside the starter housing and stores tension as the cord is pulled, retracting the cord when released.
Method 1: Spring Intact and In Place
- Pre-wind the pulley by turning it 4 to 6 full rotations against the spring tension (exact turns vary by model; check your manual).
- Align the cord hole on the pulley with the exit hole in the housing.
- Hold the pulley securely using pliers or a clamp to prevent the spring from unwinding.
Method 2: Spring Needs Rewinding or Replacement
- Remove the pulley carefully to expose the spring.
- Using gloves, manually rewind the spring into its housing, ensuring the spring’s end hooks into the pulley notch.
- Re-seat the pulley and pre-wind as described above.
Important tips: It may take some trial and error to get the tension right. Too much tension can snap the rope; too little means poor retraction. Always handle the spring with caution as it can release forcefully.

For a detailed visual guide, consider watching Family Handyman’s pull-start repair video or Popular Mechanics pull-start fix tutorial.
E. Threading and Knotting the New Cord
Follow these detailed steps:
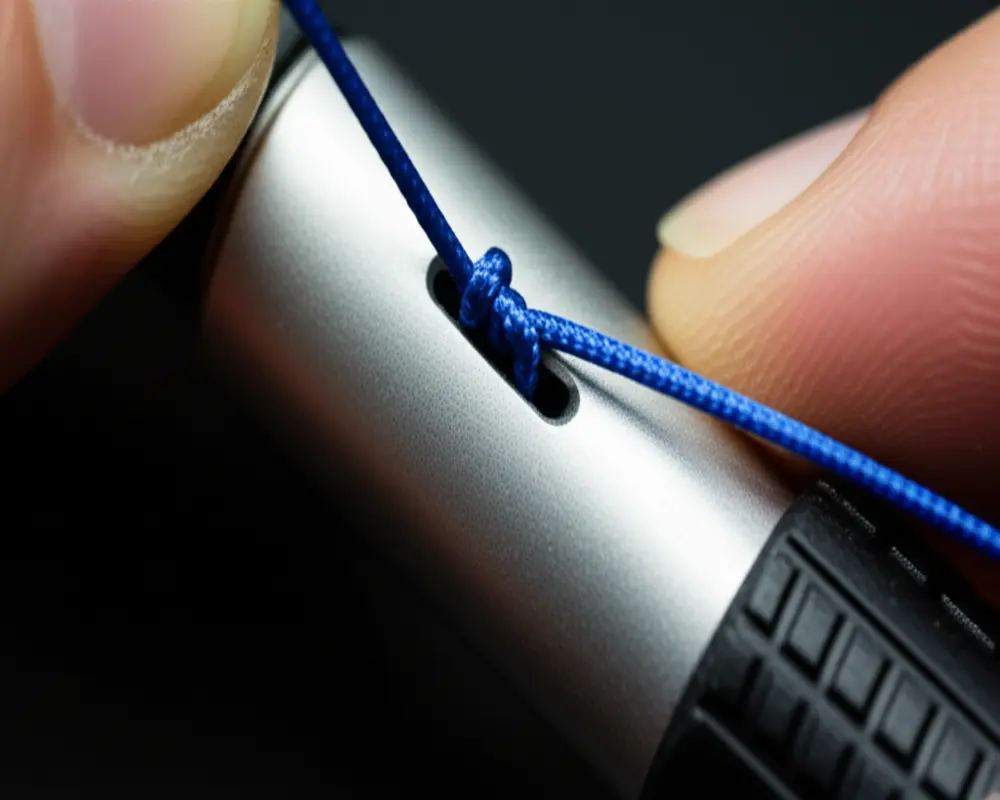
- Feed the new cord through the rope exit hole in the housing.
- Pass the cord through the pulley hole.
- Tie a secure knot such as a figure-eight or double overhand to anchor the cord to the pulley.
- Melt the cord end with a lighter to prevent fraying and help the knot hold.
- Carefully release the pulley tension and allow the cord to retract smoothly into the housing.

F. Installing the Handle and Finalizing the Cord Length
Complete the pull cord setup as follows:
- Feed the cord through the handle.
- Tie a secure knot inside the handle to keep it attached.
- Melt the end of the handle knot to prevent fraying.
- Test the cord length by pulling to ensure it retracts fully but extends enough for starting.
- Make adjustments by retying the handle knot if necessary.
G. Reassembling the Leaf Blower
Finish the repair:
- Reinstall the recoil starter assembly onto the engine block, securing all bolts or screws.
- Replace the engine cover or shroud and fasten securely.
- Reconnect the spark plug wire.
Now your leaf blower should start easily with a smooth pull and proper cord retraction.
V. Troubleshooting Common Repair Issues
If you encounter issues after repair, consider the following possibilities:
A. Cord Doesn’t Retract Fully
Possible causes:
- Insufficient pre-tension on the recoil spring.
- Spring binding or damage.
- Excess friction along the cord path.
B. Cord Pulls Too Easily, No Resistance
Could be due to:
- Spring not engaged properly with the pulley.
- Spring uncoiled or broken.
- Starter pawls not engaging the flywheel.
C. Cord is Stiff or Won’t Pull
Check for:
- Jammed or seized recoil spring.
- Debris obstructing movement in the assembly.
- Engine seizure (recheck initial diagnosis).
D. Cord Breaks Again Quickly
Likely reasons:
- Use of poor-quality starter rope.
- Sharp edges inside the housing or pulley causing abrasion.
- Incorrect spring tension, especially excessive tension.
VI. When to Seek Professional Repair or Replace Your Leaf Blower
Despite your best efforts, some situations require expert intervention or replacement:
A. DIY Limitations
- Engine is seized or has serious internal damage.
- Complex mechanical failures beyond the starter assembly.
- Lack of proper tools or experience to safely complete repair.
- Safety concerns, especially with high-tension springs.
B. Cost-Benefit Analysis
Evaluate repair costs and time against professional service fees and the price of a new leaf blower. Consider the age and condition of your equipment as well.
C. Finding a Reputable Repair Shop
Look for repair services with certified technicians, positive reviews, and transparent pricing. Local garden equipment stores often provide repair or can recommend trusted professionals.
VII. Preventative Maintenance to Avoid Future Pull Cord Issues
Extend the life of your pull cord with these tips:
- Use proper pulling technique—avoid yanking violently to reduce stress.
- Store your leaf blower in a dry environment to prevent corrosion.
- Clean the recoil assembly regularly to remove dirt and debris.
- Inspect the cord periodically for fraying and replace proactively.
Routine maintenance can significantly reduce repair frequency and enhance tool reliability.
VIII. Conclusion: Enjoy Your Repaired Leaf Blower!
Leaf blower pull cord repair combines careful diagnosis, expert handling of the recoil mechanism, and thoughtful maintenance to restore your tool’s reliable operation. By following this detailed guide, you can confidently perform repairs, troubleshoot issues, and keep your equipment ready for the seasons ahead.
Remember, safety is paramount when working with power tools, especially when handling recoil springs. If you found this guide helpful, feel free to share your experience or explore related repair topics such as backpack leaf blowers or cordless leaf blower maintenance on our site.
Expert Tip: Regularly inspecting and maintaining your pull cord and recoil starter assembly not only prevents sudden failures but also ensures smoother starts and longer equipment life.
FAQs About Leaf Blower Pull Cord Repair
Q1: How long does a typical pull cord repair take?
A: For most DIYers, repairing or replacing a pull cord can take between 30 minutes to an hour, depending on the model and your familiarity with small engine parts.
Q2: Can I use any rope for pull cord replacement?
A: It’s best to use starter rope specifically designed for leaf blowers, usually nylon or polyester with the correct diameter and length to ensure durability and proper fit.
Q3: What if the recoil spring is broken? Can I repair it?
A: Recoil springs are delicate and can be dangerous to handle. It’s recommended to replace a broken spring with a new one or the entire recoil starter assembly for safety and reliability.
Q4: How can I tell if the engine is seized?
A: Remove the spark plug and try to rotate the flywheel by hand. If it doesn’t move, the engine may be seized and professional repair is required.
Q5: Is it safe to repair the pull cord myself?
A: Yes, with proper safety precautions like disconnecting the spark plug, wearing gloves and glasses, and carefully handling the recoil spring, many repairs can be safely done at home.
For more detailed information on related topics, visit our comprehensive guides on leaf blower troubleshooting and Black & Decker leaf blower reviews.

