
Leaf Blower Carburetor Cleaning: Step-by-Step Guide for Optimal Performance
Maintaining your leaf blower's carburetor is crucial for ensuring reliable operation and peak performance. Over time, dirt, grime, and fuel residues accumulate inside the carburetor, impeding fuel flow and causing issues such as difficulty starting, loss of power, and engine stalling. This comprehensive guide will walk you through the process of leaf blower carburetor cleaning—from identifying symptoms to detailed cleaning steps, reassembly, testing, and preventative maintenance. By the end, you’ll be equipped with the knowledge to revive your leaf blower and extend its lifespan, all from the comfort of your own workspace.
Introduction: Revitalize Your Leaf Blower
A leaf blower operates efficiently only when its carburetor functions smoothly. The carburetor mixes air and fuel in precise proportions for combustion. When it becomes clogged or dirty, the engine struggles to run properly. While professional servicing is an option, performing carburetor maintenance yourself offers several benefits. It reduces downtime, saves money, and deepens your understanding of your equipment.
This guide covers how to recognize when your carburetor needs attention, the tools required, safety precautions, a detailed cleaning procedure, testing and adjustments post-cleaning, troubleshooting, and tips to prevent future issues.
Signs Your Leaf Blower Carburetor Needs Cleaning
Detecting carburetor problems early can save you from more complicated repairs down the line. Common symptoms include:
- Hard starting: The engine struggles to start or requires multiple pulls.
- Rough idle: The engine runs unevenly or sputters when idling.
- Loss of power: The blower fails to reach full throttle or lacks strong airflow.
- Stalling: The engine stops abruptly during operation.
It’s important to differentiate these symptoms from other issues such as poor fuel quality, a clogged air filter, or faulty spark plugs. Conduct a quick diagnosis by checking the fuel freshness, inspecting the air filter for dirt, and examining the spark plug for wear or fouling. If these components are in good condition, the carburetor is likely the culprit.
Important Safety Precautions Before Starting
Working with gasoline engines demands respect for safety. Before beginning the cleaning process, take the following precautions:
- Wear personal protective equipment including gloves and safety glasses to protect against harsh cleaners and fuel spills.
- Ensure your workspace is well-ventilated and free from open flames or sparks to prevent fire hazards.
- Handle and store fuel carefully—use approved containers and avoid inhaling fumes.
- Disconnect the spark plug wire to prevent accidental starting and allow the engine to cool completely to avoid burns.
Following these steps protects both you and your equipment during maintenance.
Tools and Materials Required
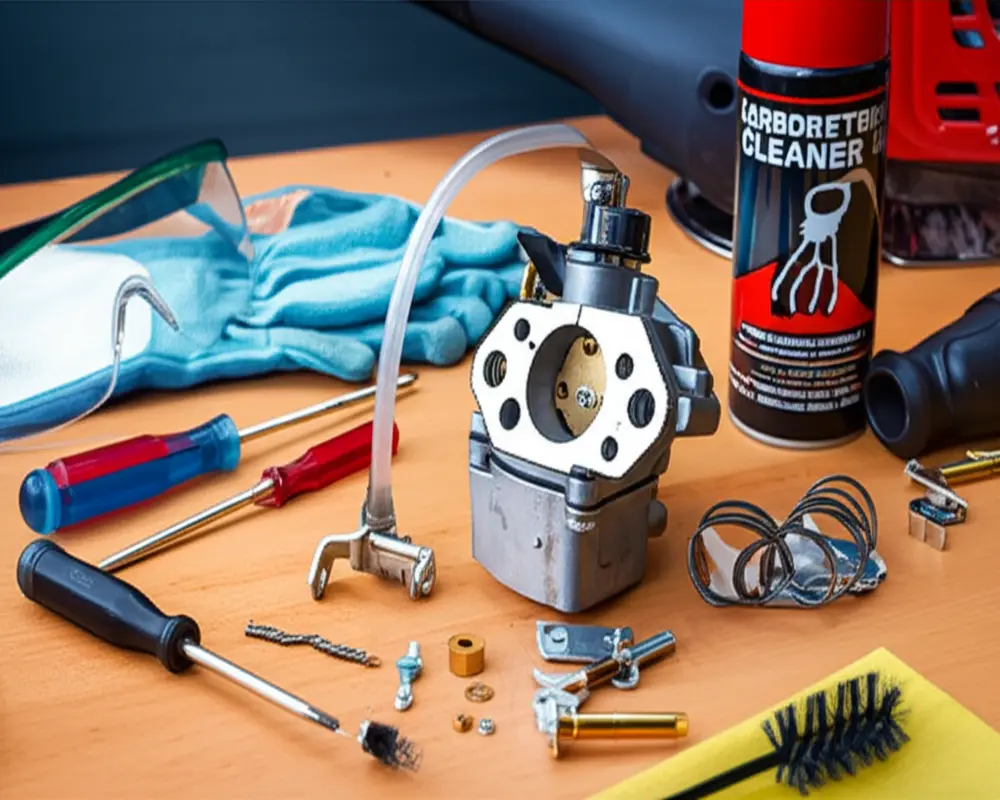
Having the right tools and supplies on hand streamlines the cleaning process. You will need:
- Screwdrivers (both flathead and Phillips), socket wrench set, and pliers for disassembly.
- A wire brush and compressed air for scrubbing and clearing small passages.
- Carburetor cleaner spray designed to dissolve varnish and deposits.
- A container for soaking removable parts.
- Optional replacement parts such as gasket kits, fuel filters, fuel lines, and a new primer bulb to restore optimal function.

Step-by-Step Leaf Blower Carburetor Cleaning Process
The cleaning process involves systematic disassembly, cleaning, inspection, and reassembly. Follow these steps carefully:
Preparation
Start by draining the fuel tank to avoid spillage during carburetor removal. Remove the air filter and housing to access the carburetor, which is typically mounted between the air filter and the engine block.
Disassembling the Carburetor
Disconnect the fuel lines carefully to avoid damage or fuel leaks. Detach the throttle linkage and remove mounting bolts securing the carburetor. Gently remove the carburetor from the engine.
Internal Disassembly
Open the float bowl by loosening screws at the bottom of the carburetor. Remove the float and needle valve, then extract the main and pilot jets. Inspect all parts for wear, cracks, or clogs.

Cleaning Technique
Spray carburetor cleaner generously onto all metal parts and passages. Use a wire brush or small tools to gently scrub stubborn deposits. Compressed air is useful to blow out narrow jets and channels, ensuring all debris is removed.
Inspection and Replacement
Check gaskets for brittleness or tears and replace them if necessary. Examine fuel lines for cracks or leaks, and inspect the primer bulb for cracks or hardness. Replace any defective parts to maintain fuel system integrity.
Reassembly
Reattach the float, needle valves, and jets carefully, ensuring all parts fit snugly. Install new gaskets where applicable. Reinstall the carburetor onto the engine, reconnect throttle linkages, fuel lines, and air filter housing. Verify all connections are secure and routed correctly.
Testing and Adjustments After Cleaning
Refill the fuel tank with fresh, properly mixed gasoline and prime the carburetor according to your leaf blower’s manual. Attempt to start the engine; it may take a few pulls initially as fuel circulates.
Once started, listen for a smooth idle and gradual throttle response. If your carburetor has adjustment screws, fine-tune the idle speed and air-fuel mixture for optimal engine performance. Conduct a test run under varying loads to confirm consistent power output.

Troubleshooting Common Post-Cleaning Issues
Despite thorough cleaning, some problems may persist:
Engine won't start: Re-examine spark plug condition, ensure fuel is reaching the carburetor, check choke position, and confirm that assembly was done correctly.
Engine stalls or runs poorly: Partial clogs might remain in jets or passages; air leaks can occur if gaskets are misaligned; adjustment screws may need further tuning.
Fuel leaks: Inspect float bowl seals and needle valve seating; damaged fuel lines can cause leaks requiring replacement.
Preventative Maintenance Tips
Keep your leaf blower running smoothly longer by adopting these habits:
- Always use fresh, properly mixed fuel to prevent varnish buildup.
- Apply fuel stabilizers if storing fuel for extended periods.
- Store fuel and equipment in cool, dry places away from direct sunlight.
- Run the carburetor dry before long-term storage to avoid gum deposits.
- Maintain the air filter regularly to prevent dirt from entering the carburetor.
When to Seek Professional Help
If your leaf blower shows signs of internal damage such as warped carburetor bodies or cracked components, or if cleaning fails to restore performance, it may be time to consult a professional. Complex repairs can sometimes exceed the cost of replacement, so weigh your options accordingly. Additionally, if you feel uncertain about troubleshooting or repairs, professional servicing ensures safety and proper function.
Conclusion: Enjoy a Revitalized and Powerful Leaf Blower
Cleaning your leaf blower’s carburetor is a practical way to restore its power and reliability. With the right tools, safety measures, and methodical approach, you can perform carburetor cleaning yourself, saving money and gaining valuable mechanical insight. Remember, regular maintenance extends the life of your equipment and helps you achieve better results in your yard work.
Feel free to share your experiences or questions about leaf blower carburetor cleaning—engage with fellow enthusiasts and experts to deepen your understanding and mastery of small engine care.
Frequently Asked Questions (FAQs)
- How often should I clean my leaf blower carburetor?
- Typically, cleaning is recommended annually or after about 25 hours of use, but it depends on fuel quality and operating conditions.
- Can I use any carburetor cleaner for my leaf blower?
- Use a cleaner specifically designed for small engines to avoid damage and ensure effective cleaning.
- Is it safe to clean the carburetor without removing it?
- Partial cleaning may help, but thorough cleaning requires removal and disassembly to reach all passages and jets.
- What causes carburetor clogging?
- Old fuel, dirt, and debris accumulation cause varnish buildup inside the carburetor, leading to clogs.
- Can I adjust the carburetor without cleaning it?
- Adjustments help with tuning but won’t solve clogs or dirt buildup obstructing fuel flow.
For more on lawn equipment maintenance, see our guide on Lawn Mower Troubleshooting.
Additional expert resources: