Keeping your pruning shears sharp is crucial for safe, efficient gardening and promoting healthy plant growth in 2025. How to sharpen pruning shears correctly matters because dull blades can damage stems and make pruning a struggle. This guide presents practical steps for sharpening pruning shears, highlighting the right tools and techniques to restore clean cuts. By mastering these, gardeners ensure their shears last longer, work better, and help maintain garden vitality.
1. Understanding Pruning Shears and Why Sharpness Matters
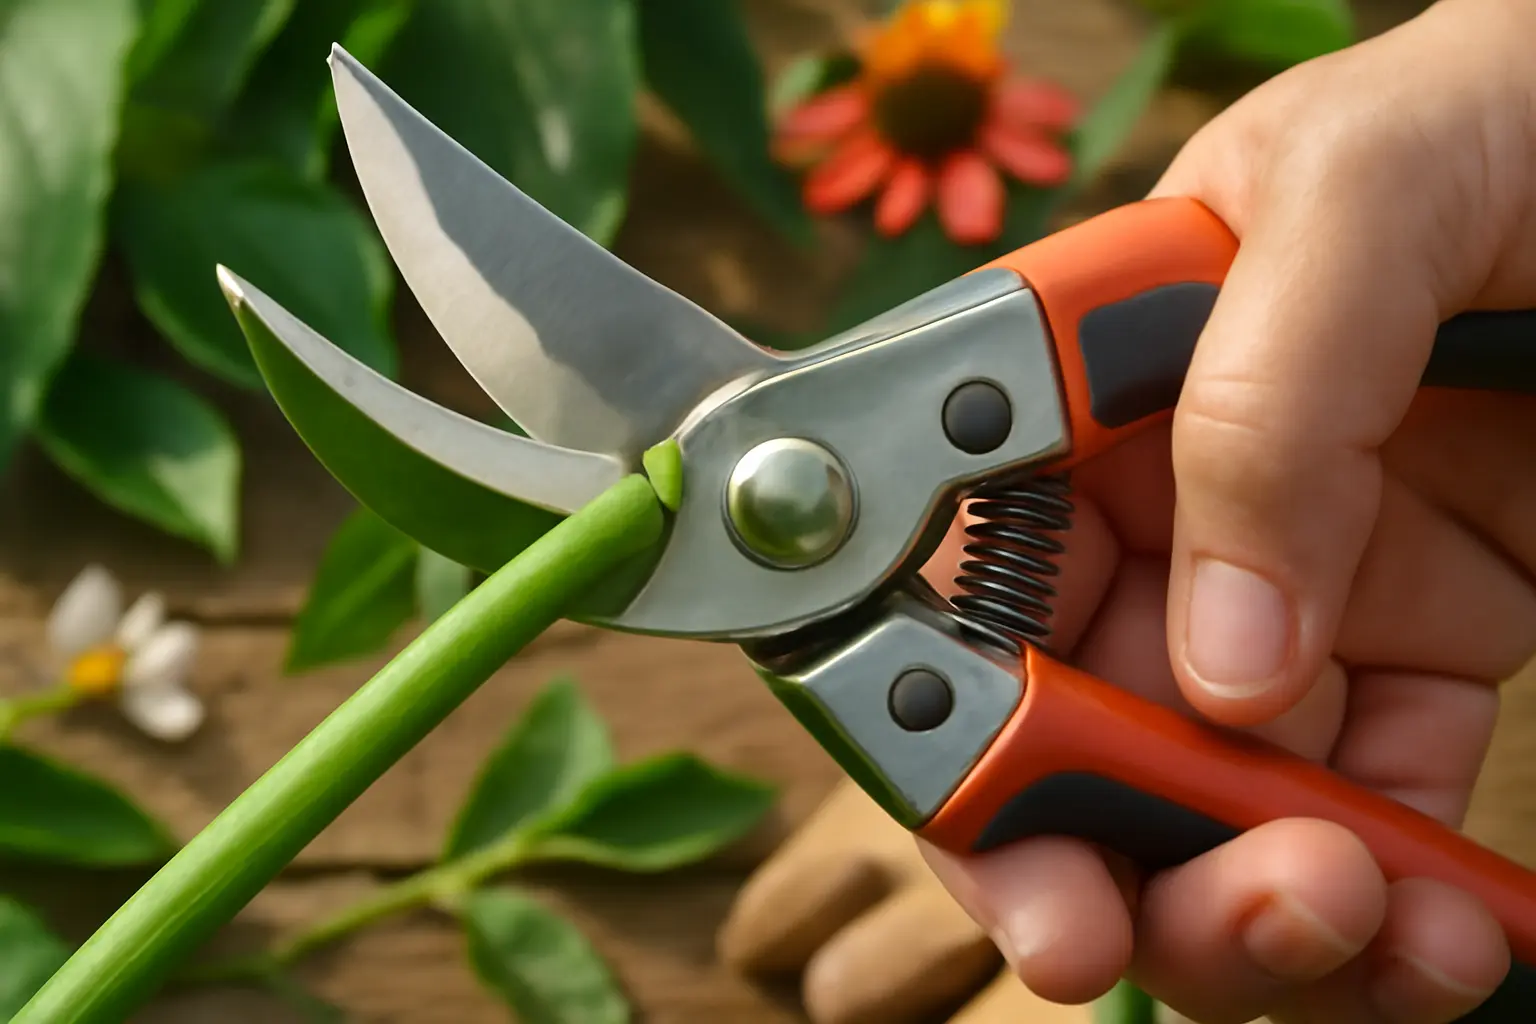
Pruning shears, also known as secateurs, are essential gardening tools designed to trim plants, shrubs, and small branches with precision. In 2025, understanding how to sharpen pruning shears is more crucial than ever to maintain their cutting efficiency. Sharp blades make clean cuts that heal quickly, reducing the risk of plant diseases and promoting healthy growth. Dull blades, by comparison, crush stems and cause ragged edges that harm plants and demand more physical effort. For example, when pruning rose bushes, a sharp shear ensures a smooth cut, helping prevent infection and encouraging vigorous blooms. Proper sharpening not only extends tool life but also enhances user comfort and safety by reducing hand strain. Regular maintenance of pruning shears is a key practice for any gardener aiming for excellence in plant care.
2. Tools and Materials Needed to Sharpen Pruning Shears
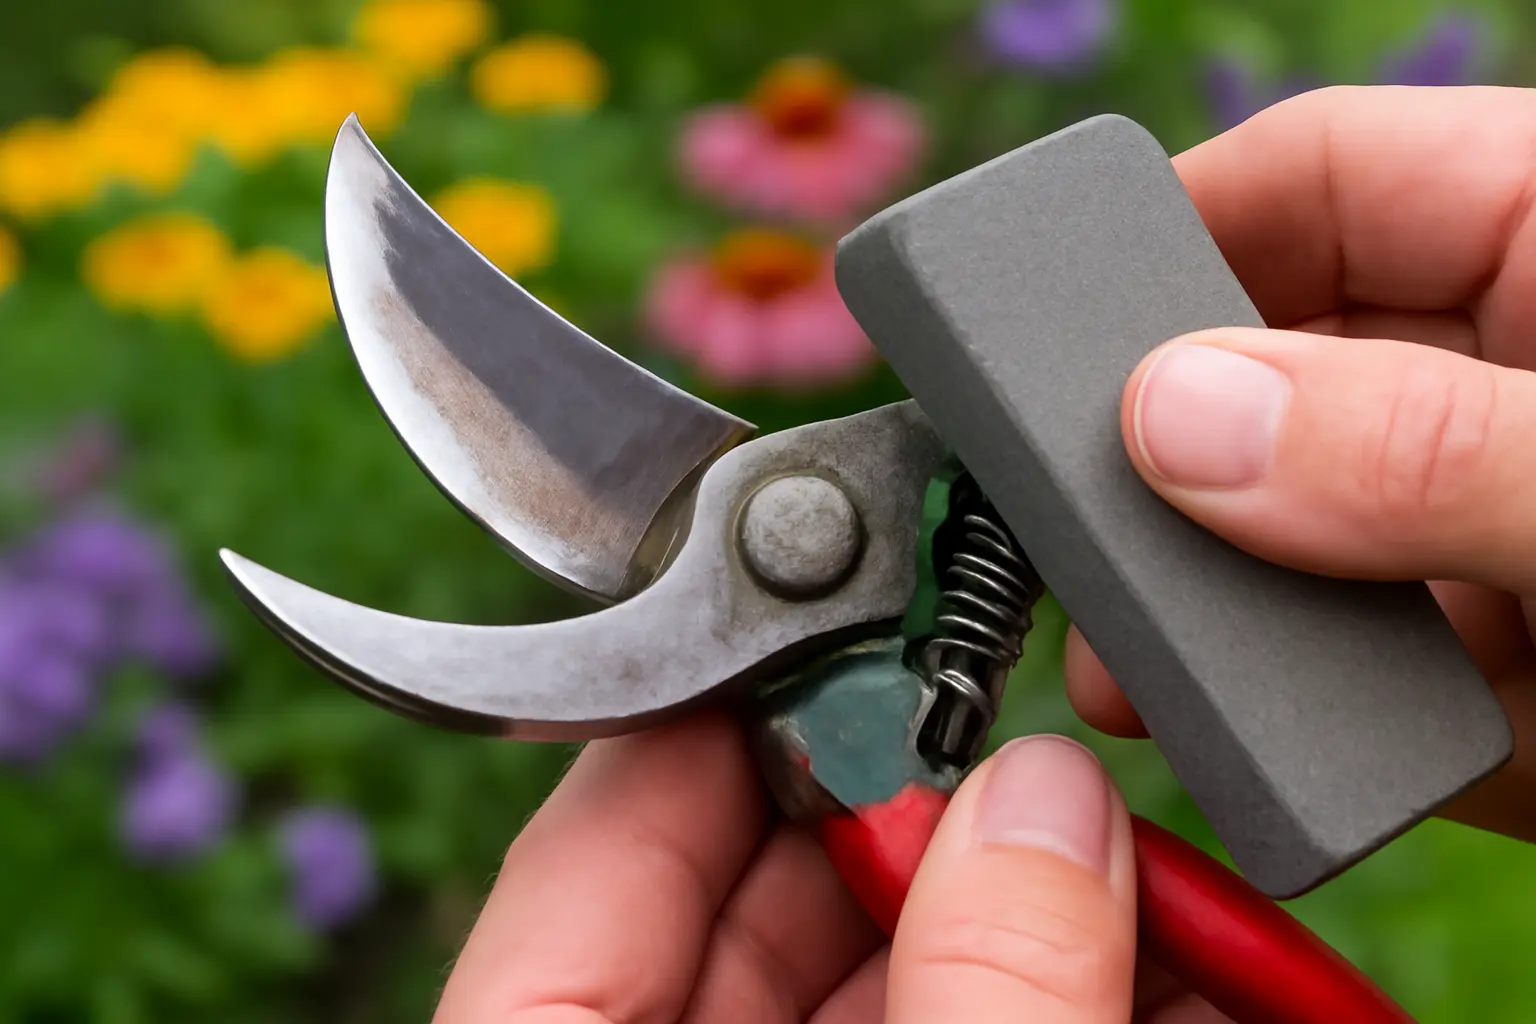
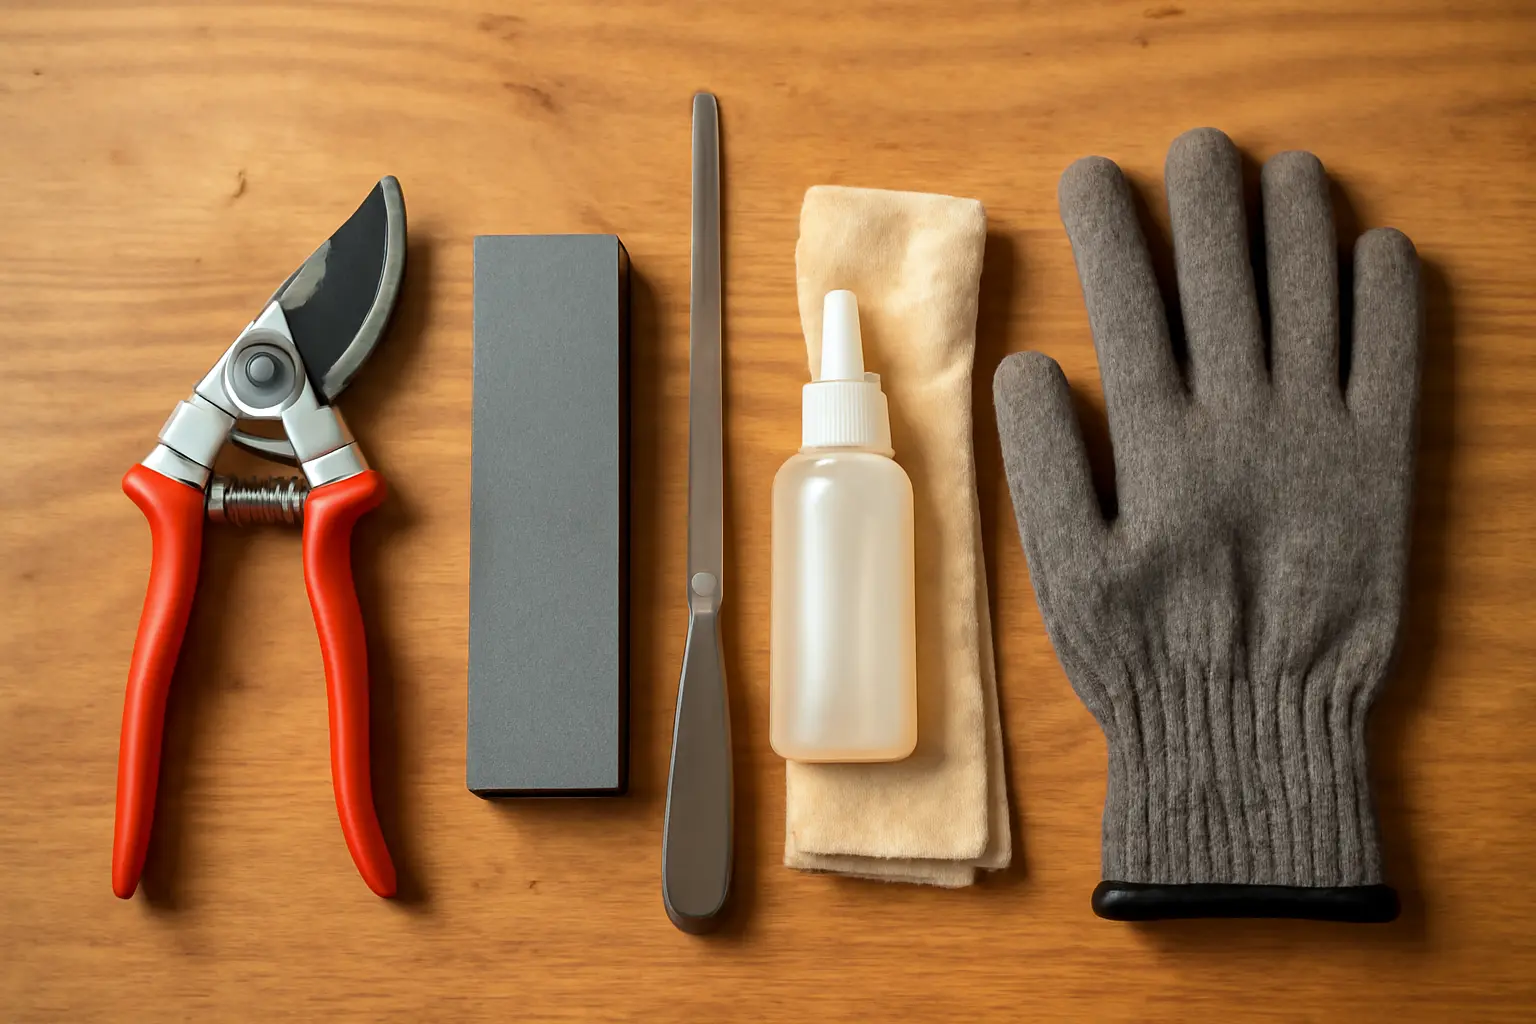
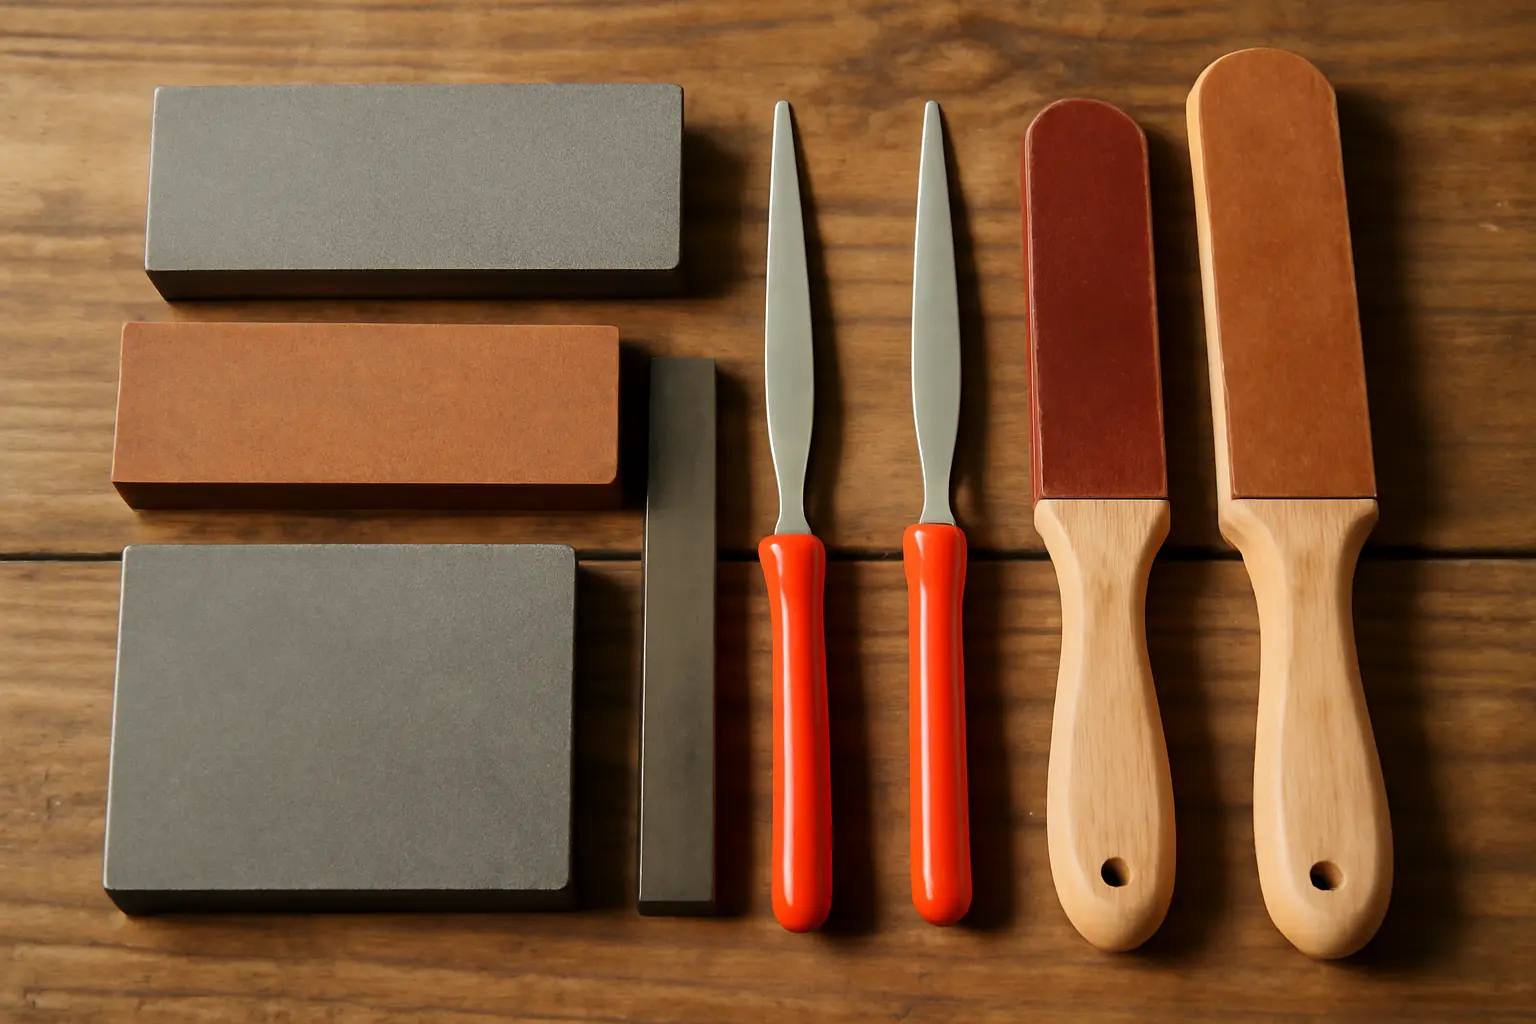
Sharpening pruning shears effectively in 2025 requires the right tools and materials to ensure a clean, precise cut every time. The first essential item is a diamond file, valued for its durability and ability to reshape dull blades quickly. This tool is ideal for removing nicks and restoring sharp edges without damaging the steel. Next, a whetstone serves to refine the blade’s edge after filing, offering a finer finish that prolongs the shears’ sharpness and cutting efficiency.
Lubrication plays a crucial role during sharpening; a light application of oil reduces friction and prevents metal oxidation, ensuring smoother operation over time. Use a clean cloth both to apply oil evenly and to wipe away any residual filings or moisture, maintaining the blade’s condition.
In summary, the combination of a diamond file for initial grinding, a whetstone for edge refinement, oil for smooth action, and a cloth for cleaning forms a comprehensive kit. Each component supports the others, culminating in optimal sharpening results that extend the lifespan of pruning shears and improve garden maintenance performance. This set-up is particularly recommended for gardeners aiming to keep tools in top shape without frequent professional servicing.
3. Safety Precautions Before Sharpening
Before you begin to sharpen pruning shears, prioritizing safety measures is essential. Handling sharp blades requires caution to avoid injuries and ensure effective sharpening. First, always wear durable gloves to protect your hands from accidental cuts. Next, firmly secure the shears using a vise or a clamp; this stability prevents slipping during sharpening. Additionally, clean the blades thoroughly to remove sap, dirt, and rust which can interfere with sharpening tools and impact results. Proper cleaning can involve wiping with a damp cloth and using mild detergent if necessary. Keeping a tidy workspace free of clutter also reduces risks of accidents. These simple steps establish a safe environment that allows you to focus on restoring sharp edges efficiently, keeping in mind that a well-maintained tool enhances garden productivity and personal safety in 2025 and beyond.
4. Should You Disassemble Your Pruning Shears?
When it comes to how to sharpen pruning shears effectively in 2025, the decision to disassemble them hinges on both the tool’s complexity and your experience level. Disassembling your pruning shears can grant better access to the blades, allowing you to sharpen every edge thoroughly and remove accumulated debris, rust, or sap that might hinder performance.
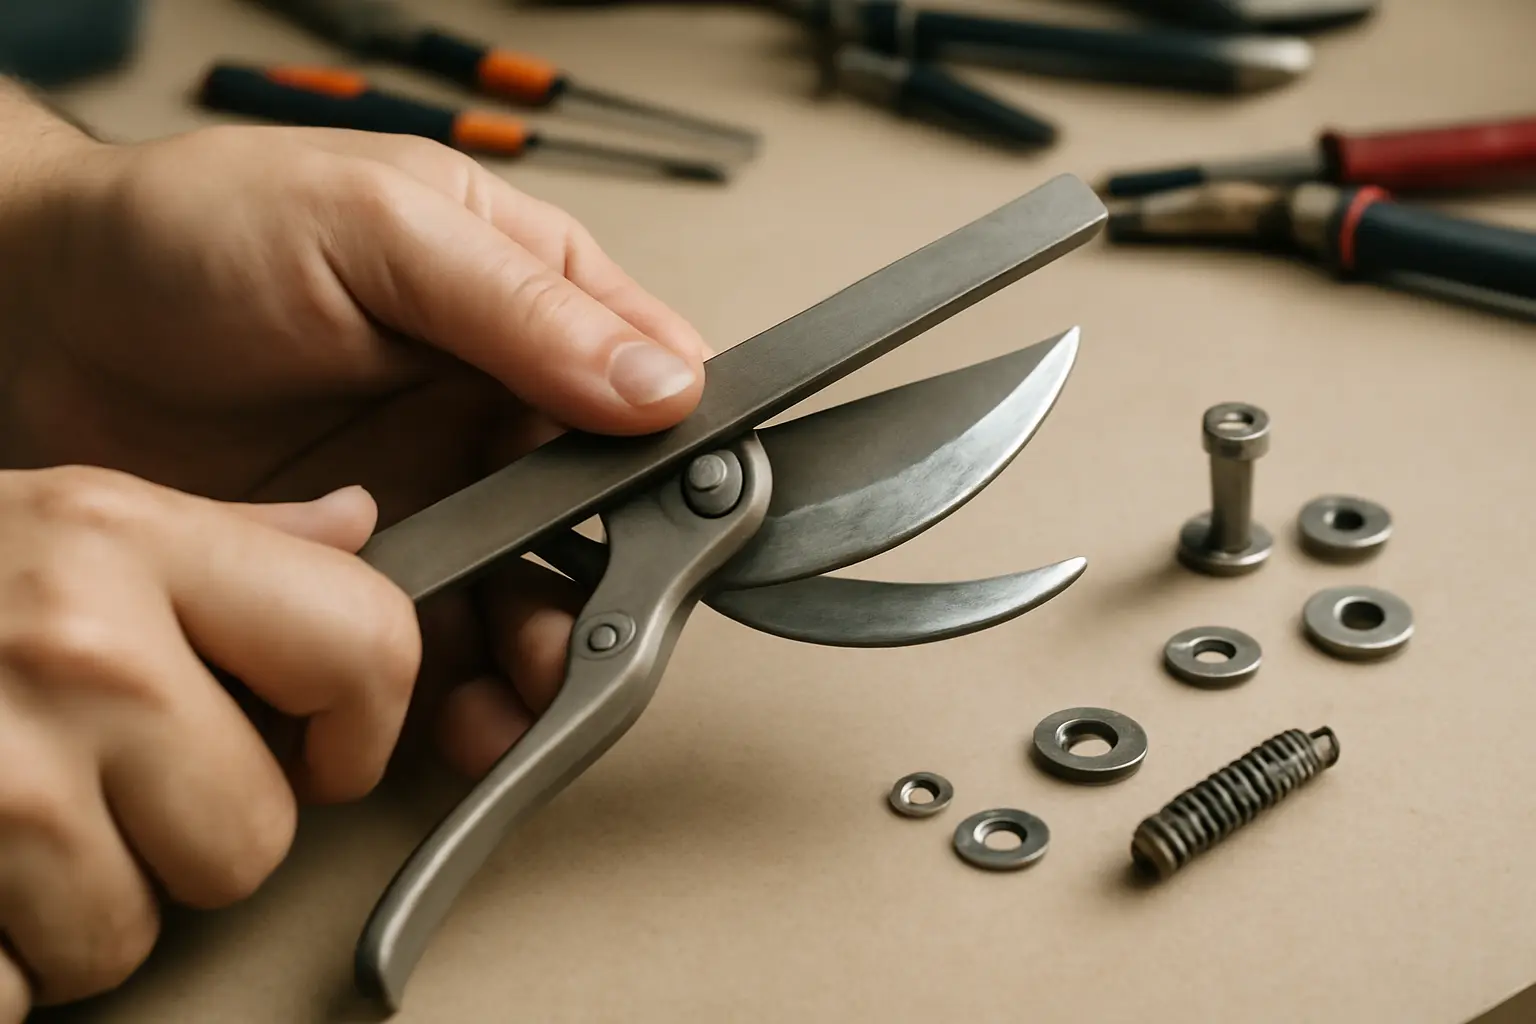
However, it’s not without risks. Taking apart the shears incorrectly may misalign the blades or cause small parts to get lost, compromising the tool’s cutting precision. Here are key considerations:
– Disassemble only if your pruning shears have complex pivot mechanisms or are heavily soiled.
– Start by loosening the central bolt carefully; remember the order of washers and springs.
– Clean all components with a suitable solvent before sharpening.
– Use a sharpening stone or file on the blades individually, ensuring you maintain the original bevel angle.
– Reassemble the shears and check alignment by testing on a branch.
For simple bypass shears, many gardeners prefer sharpening them assembled to avoid complications. Yet, if you encounter persistent dullness, disassembly might be necessary for a deeper maintenance session. This approach embodies a balance between preserving your tool’s integrity and achieving the sharpest edge possible, essential to efficient pruning in your garden.
5. Step-by-Step Guide on How to Sharpen Pruning Shears
Sharpening pruning shears ensures clean cuts, which is vital for plant health and easy gardening. In 2025, mastering this skill involves attention to the blade’s bevel angle, gradual grit progression, and technique suited for both bypass and anvil shears. Begin by cleaning the blades to remove sap and dirt. Identify the bevel edge—this is the angled side you will sharpen.
Use a sharpening stone or file with the right grit, starting coarse to shape the edge, then finer grits to refine it. Maintain the original bevel angle, typically around 20 to 30 degrees, to preserve blade integrity. For bypass shears, sharpen the cutting blade only; for anvil, sharpen the single blade, which presses onto a flat surface.
Consistent, gentle strokes away from the sharp edge prevent damage. Check the edge regularly for uniform sharpness and remove burrs from the opposite side with a fine stone. After sharpening, lubricate the pivot and blades to ensure smooth operation.
Clear visuals could guide the proper angle and stroke direction, but the essential takeaway is maintaining blade shape while progressing through grit levels. Proper sharpening extends the tool’s life and keeps your pruning precise and plant-friendly, an expert practice every gardener must master.
6. Deburring and Reassembling the Shears
After sharpening pruning shears, burrs inevitably form along the blades’ edges, which can hinder their cutting performance and cause uneven cuts. Removing these burrs is crucial for maintaining sharpness and prolonging the tool’s lifespan. Use a fine-grit sharpening stone or a piece of fine sandpaper to gently deburr by running it along the blade edges until smooth to the touch. This process ensures the blades glide cleanly through branches without snagging.
When it comes to reassembling the shears, precision ensures they function correctly. Align the blades carefully before tightening the central bolt or screw just enough to hold parts securely but still allow smooth pivoting. Over-tightening may cause stiffness, while loose assembly can result in blade misalignment and unsafe use. Reattach any springs or washers in their original order and test the shears by opening and closing a few times to confirm smooth operation.
Mastering how to sharpen pruning shears includes this final but important step of deburring and proper reassembly, a vital routine in professional garden tool maintenance in 2025. Regular attention to these details ensures efficient pruning, cleaner cuts, and longer-lasting shears, ultimately saving time and costs on tool replacement or frequent sharpening sessions.
7. Cleaning and Maintenance After Sharpening
After sharpening pruning shears in 2025, proper cleaning and maintenance become essential to extend the tool’s lifespan and maintain cutting precision. Removing metal filings left over from the sharpening process is crucial to prevent damage or rust. Use a stiff brush or old toothbrush to sweep away filings, and wipe the blades thoroughly with a damp cloth. To protect the shears from corrosion, apply a lightweight machine oil or WD-40 to the pivot joint and blade surfaces, ensuring smooth operation and rust prevention.
Proper storage also plays a vital role in upkeep. Store shears in a dry environment, ideally in a protective sheath or hung on a pegboard to keep blades from dulling against other tools. Regularly check tension screws and clean the tool after each use to avoid sap or residue buildup that can degrade performance.
By following these cleaning and maintenance steps after sharpening, gardeners and professionals can keep pruning shears sharp, reliable, and ready for each task—this remains fundamental knowledge for anyone learning how to sharpen pruning shears effectively.
8. How Often to Sharpen and Signs Your Shears Need It
Sharpening pruning shears is essential to maintain clean cuts that promote healthy plant growth. The frequency of sharpening depends on your usage and the types of plants you prune. For example, if you frequently trim woody, dense branches, you may need to sharpen your shears every few weeks. Conversely, lighter tasks with soft-stemmed plants require less frequent sharpening, perhaps once every couple of months.
Look for clear signs that your shears need sharpening:
– Difficulty cutting through stems or branches, requiring more force than usual
– Jagged or crushed cuts instead of clean cuts, leading to plant damage
– Visible nicks or dull edges on the blades
– Rust or corrosion buildup, which can affect cutting efficiency
Regular inspection after every few uses is a good practice. Sharpening promptly when these signs appear ensures your tools remain effective, reduces strain on your hands, and prevents injury to plants. By understanding how to sharpen pruning shears correctly and recognizing when they need maintenance, you preserve both your tools’ lifespan and your garden’s health throughout 2025 and beyond.
9. Recommended Sharpening Tools (Optional)
When learning how to sharpen pruning shears effectively, choosing the right sharpening tools can significantly ease the process and improve results. High-quality diamond files stand out for their durability and ability to precisely refine blades without removing too much metal. For example, a fine-grit diamond file can restore a razor-sharp edge quickly and effortlessly, making it a valuable tool for both beginners and experienced gardeners. Another excellent sharpening option is a whetstone with a medium to fine grit, which offers smooth sharpening and can be used wet to reduce friction and heat buildup, preserving the steel’s integrity. Brands like DMT and Norton are trusted for consistent quality and value. Incorporating these sharpening tools in your maintenance routine not only ensures cleaner cuts but also extends the lifespan of your pruning tools, making them worthwhile investments for anyone seeking professional-level blade care.
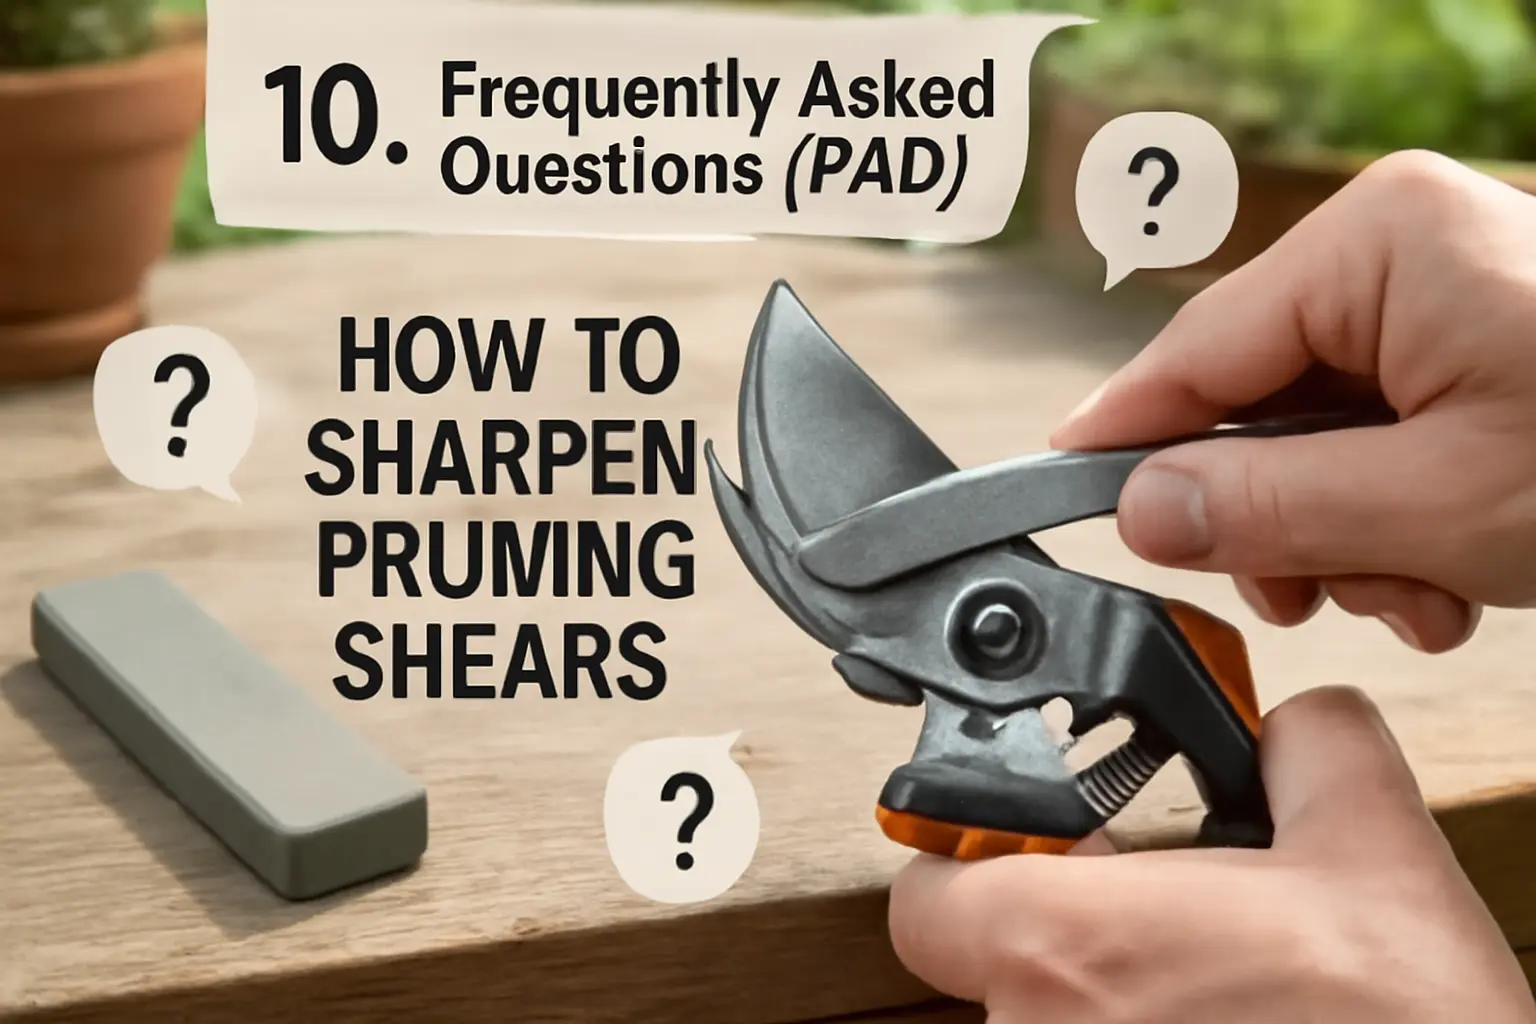
10. Frequently Asked Questions (FAQ)
Sharpening pruning shears is a vital skill for garden maintenance, but it often raises practical questions. Understanding how to sharpen bypass and anvil pruners differently is essential because bypass pruners have two sharpened blades that slide past each other, requiring precise edge honing, while anvil pruners have a single sharp blade that cuts against a flat surface, necessitating a different sharpening angle. Before sharpening, effectively removing rust is crucial to avoid damaging the blade; use fine steel wool or a rust eraser combined with a bit of lubricant, working gently to preserve the blade’s integrity. If pruning shears are damaged beyond sharpening, such as having deep nicks or bent blades, replacement is often safer and more cost-effective than attempting repairs. Regular maintenance, including cleaning, lubrication, and timely sharpening, extends tool life and ensures clean cuts. Gardeners often find these practical guidelines make routine sharpening more manageable and avoid hobbyist frustration.
11. Contextual Bridge: Expanding Your Tool Care Knowledge
Sharpening pruning shears is just one skill in a broader toolkit necessary for excellent garden tool maintenance in 2025. Proper care extends beyond sharpening; it involves cleaning, oiling, and storing tools to maximize lifespan and performance. For example, after learning how to sharpen pruning shears effectively, gardeners should also explore the maintenance of hedge trimmers and loppers, which require similar sharpening techniques but differ in blade types and angle precision. This interconnected approach improves overall garden care efficiency and tool reliability throughout the seasons. Remember, using quality sharpening stones or files suitable for each tool enhances results and prevents damage. Expanding your knowledge to include cleaning rust, tightening loose screws, and lubricating moving parts ensures every tool functions safely and smoothly. Practically, setting up a maintenance routine—such as weekly checks and sharpenings during active gardening months—helps maintain sharp edges and reduces strain when pruning, ultimately benefiting plant health and gardener safety.