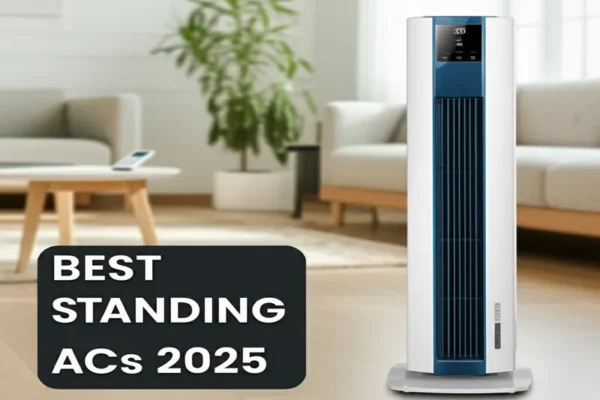
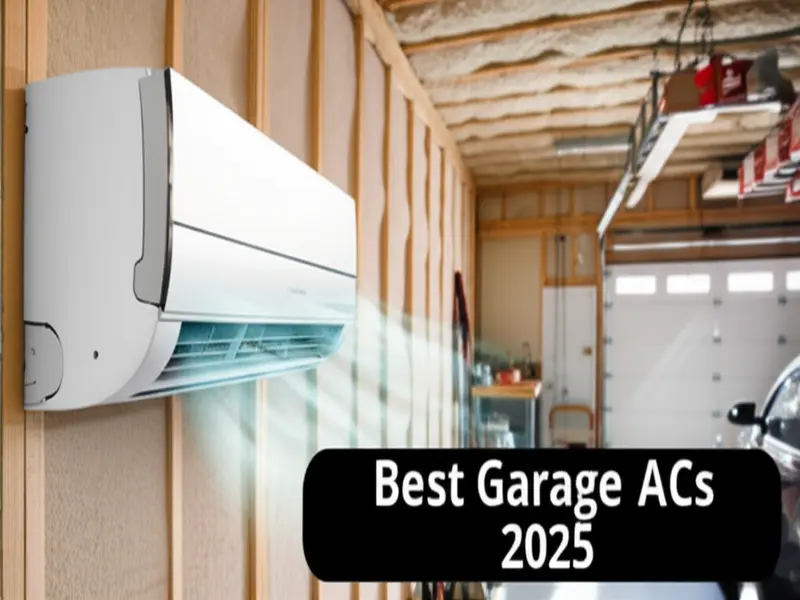
Best garage air conditioners for well insulated garage 2025
BLACK+DECKER Smart Portable Air Conditioner with Heat Review
When it comes to maintaining comfort in your home year-round, a versatile climate control solution is essential. The BLACK+DECKER Smart Portable Air Conditioner with Heat, 14,000 BTU offers a powerful and portable way to cool, heat, dehumidify, and circulate air in spaces up to 700 sq. ft. In this review, we’ll explore how this all-in-one unit stands out and whether it could be the perfect addition to your home environment.

Key Features
- Four-in-One Functionality: This unit doesn’t just cool; it also provides 12,000 BTU heating, dehumidifies, and acts as a fan—ideal for versatile year-round use.
- Powerful Cooling Capacity: With 14,000 BTU ASHRAE cooling power (10,200 BTU SACC), it efficiently cools rooms up to 700 sq. ft., perfect for bedrooms, living rooms, or home offices.
- Smart Controls & Voice Integration: Connect via Wi-Fi to control the unit remotely through an intuitive app available on iOS and Android. Voice commands via Amazon Alexa or Google Assistant add convenience.
- Follow Me Remote Feature: The remote doubles as a thermostat, measuring temperature where you are, so the AC adjusts to your exact location for personalized comfort.
- Easy Installation: Comes with a simple-to-install window kit that fits most standard windows, making setup a breeze.
- Compact and Portable: Measuring just 16.5” x 14.06” x 27.09”, it’s easy to move between rooms or apartments without hassle.
Pros and Cons
- Pros:
- Multi-functional: cools, heats, dehumidifies, and fans in one device
- Smart remote and voice control capabilities
- Effective for medium to large rooms up to 700 sq. ft.
- Compact and portable design
- Follow Me feature enhances temperature precision
- Easy window installation kit included
- Cons:
- Heating capacity slightly lower compared to cooling BTU
- Requires venting through a window which may limit placement options
- Wi-Fi functions depend on stable internet connection
Performance & User Experience
In real-world use, the BLACK+DECKER Smart Portable AC delivers reliable cooling and heating performance, quickly adjusting room temperatures even on hot summer days or chilly winter nights. The smart app interface is user-friendly, allowing effortless temperature adjustments from anywhere. The Follow Me Remote adds a thoughtful touch by ensuring the area around you stays comfortable, not just the unit’s physical location. Users appreciate the quiet operation and ease of mobility, making it suitable for rental homes or rooms without central HVAC.
Comparison
Compared to similar models like the Whynter ARC-14SH, the BLACK+DECKER unit offers comparable cooling and heating output but edges ahead with integrated smart controls and voice assistant compatibility. While some competitors offer higher dehumidification rates, BLACK+DECKER’s four-in-one approach with seamless app connectivity gives it a modern advantage.
Who is This Product For?
This portable air conditioner with heat is ideal for anyone needing flexible climate control in medium-sized rooms such as apartments, bedrooms, or home offices. It’s especially suited for tech-savvy users who value smart home integration and remote control convenience. Those looking for a compact, multi-functional device to maintain comfort throughout the year will find this unit meets those needs well.
Final Verdict
The BLACK+DECKER Smart Portable Air Conditioner with Heat stands out as a reliable, multifunctional climate control solution. Its powerful cooling and heating abilities combined with smart features and portability make it a strong contender for year-round home comfort. While minor limitations exist, the benefits far outweigh them, delivering excellent value for those seeking convenience and efficiency.
Ready to upgrade your home comfort? Buy Now and enjoy a smarter, more comfortable living space today!
BLACK+DECKER 18,000 BTU Window or Through The Wall Air Conditioner Review
When summer heatwaves hit, having a reliable air conditioner is essential to keep your living or working space comfortable. The BLACK+DECKER Window or Through The Wall Air Conditioner 18000 BTU is designed to cool large rooms efficiently while offering versatile installation options and convenient features. If you’re looking for a powerful cooling solution that adapts to your space and lifestyle, this unit is worth considering. Let’s dive into why this air conditioner stands out.
Key Features
- Powerful Cooling Capacity: With 18,000 BTU, this air conditioner cools rooms up to 1,000 square feet, making it ideal for spacious living rooms, apartments, or office floors.
- Multiple Cooling Speeds & Modes: Choose from four levels—auto, low, medium, and high—to customize your comfort. It also includes a fan-only mode for gentle airflow without cooling.
- Full-Function Remote Control: Easily adjust settings like sleep mode, energy saver, and a 24-hour timer without leaving your seat.
- Easy Installation: Accordion-style side panels fit standard double-hung windows (28″ to 40.5″ wide, at least 18.5″ high). Plus, it comes with wall sleeve parts for through-the-wall setups (professional installation recommended).

Pros and Cons
- Pros:
- High BTU rating suitable for large rooms and open floor plans
- Remote control enhances convenience and user-friendliness
- Versatile installation options (window or through the wall)
- Energy saver and sleep mode help reduce electricity bills
- Simple accordion side panels make window installation straightforward
- Cons:
- Through-the-wall installation requires a professional electrician
- May be bulkier than smaller units, requiring careful planning for window placement
- Some users might find noise levels higher on the highest fan speed
Performance & User Experience
In real-world use, the BLACK+DECKER BD18WT6 performs impressively, delivering consistent cooling even in larger spaces. The multiple fan speeds allow you to control airflow intensity, while the sleep mode gently adjusts temperature and fan speed overnight for uninterrupted rest. Users appreciate the remote control’s convenience, eliminating the need to manually change settings. The installation process for window mounting is straightforward thanks to accordion-style panels, but the included wall sleeve makes through-the-wall installation a more permanent, sleek option for those willing to invest in professional setup.
Comparison
Compared to similar models like the LG LW1817ERSM 18,000 BTU window air conditioner, the BLACK+DECKER unit offers the added benefit of through-the-wall installation flexibility, which is not commonly available. While LG boasts Wi-Fi connectivity for smart home integration, the BLACK+DECKER focuses on robust performance and ease of installation. Both provide strong cooling capabilities, but users seeking a hybrid installation approach may prefer the BLACK+DECKER model.
Who Is This Product For?
- Homeowners or renters needing to cool medium to large rooms up to 1,000 sq ft
- Office managers looking for reliable, efficient air conditioning for workspaces
- Users who want flexible installation options—whether window-mounted or through-the-wall
- Anyone valuing convenience features like remote control, sleep mode, and timers
Final Verdict
The BLACK+DECKER 18,000 BTU Window or Through The Wall Air Conditioner is a solid choice for those who need powerful cooling and versatile installation solutions. Its user-friendly features, combined with strong performance and efficient operation, make it a dependable option for large rooms and various settings. While professional help is recommended for through-the-wall installation, the included components make it a great investment for long-term climate control. If you’re seeking a balance of power, convenience, and flexibility, this unit won’t disappoint.
Buy Now and stay cool all summer long!
Hykolity 12,000 BTU WiFi Enabled Portable Air Conditioner Review
When summer heat becomes unbearable, having a reliable and efficient air conditioner is essential. The Hykolity 12,000 BTU WiFi Enabled Portable Air Conditioner offers versatile cooling solutions wrapped in a smart, user-friendly design. Ideal for medium-sized rooms up to 550 sq. ft, this portable AC unit combines powerful performance with convenient features that make it worth considering for your home or office.

Key Features
- 5-in-1 Functionality: This unit cools, fans, dehumidifies, offers a sleep mode, and includes a 24-hour timer setting, making it adaptable to various climate needs throughout the year.
- WiFi Control & Remote: Adjust all settings effortlessly via the Smart Life app on your smartphone or the included remote control for ultimate convenience.
- Powerful Cooling: With 12,000 BTU (ASHRAE) capacity, it swiftly cools rooms up to 550 sq. ft, maintaining temperatures between 61°F and 88°F.
- Enhanced Comfort: Sleep mode gently raises the temperature over time for uninterrupted rest, while auto swing disperses air evenly to eliminate hotspots.
- Easy Installation & Mobility: Comes with a window adapter and exhaust hose for tool-free setup on most sliding windows. Equipped with wheels and a hidden handle for easy movement.
- Self-Evaporating System: Moisture is automatically evaporated during operation, so no manual draining is needed — perfect for humid environments.
Pros and Cons
- Pros:
- WiFi-enabled for smart, remote control
- Multiple modes for year-round use
- Quiet operation suitable for bedrooms and offices
- Self-evaporation eliminates manual drainage
- Simple installation with included window kit
- Cons:
- Effective primarily for rooms up to 550 sq. ft—may not suit larger spaces
- Remote control batteries not included
- Window kit compatible mostly with sliding windows
Performance & User Experience
The Hykolity portable AC impresses with its rapid cooling capabilities and quiet operation, making it a great choice for bedrooms and living areas. The app connectivity is responsive, allowing easy scheduling and temperature adjustments without getting up. Users praise the sleep mode for improving nighttime comfort and the self-evaporation system for reducing maintenance hassle. Moving the unit between rooms is effortless thanks to the built-in wheels and handle.
Comparison
Compared to similar models like the BLACK+DECKER BPACT12HWT, the Hykolity stands out with its WiFi functionality and enhanced multi-mode versatility. While both offer similar cooling capacities, Hykolity’s smart features and intuitive app control give it an edge for tech-savvy users seeking convenience.
Who Is This Product For?
This portable air conditioner is ideal for renters, dorm residents, or homeowners seeking a flexible cooling solution without permanent installation. It suits medium-sized rooms such as bedrooms, home offices, garages, or living rooms where quiet operation and smart controls are valued.
Final Verdict
The Hykolity 12,000 BTU WiFi Enabled Portable Air Conditioner delivers solid performance and smart features at an appealing price point. Its combination of effective cooling, multiple operational modes, and easy portability makes it a versatile option for anyone looking to stay comfortable through hot months. While it’s best suited for spaces up to 550 sq. ft, its user-friendly design and app integration add significant value.
If you’re looking for a smart, all-in-one portable AC that adapts to your needs and keeps your space cool and comfortable, this model should be near the top of your list.
Whynter Inverter Portable Air Conditioner 14,000 BTU Review: Powerful Cooling Meets Smart Convenience
When it comes to beating the heat efficiently and quietly, the Whynter Inverter Portable Air Conditioner ARC-1230WN stands out as a top contender. Rated as Forbes Vetted’s 2024 Best Portable Air Conditioner Overall, this unit combines advanced inverter technology with smart home compatibility, delivering reliable cooling for rooms up to 600 sq. ft. Whether you’re looking to cool a large living area or a spacious bedroom, this award-winning portable AC deserves a close look.

Key Features
- Inverter Technology with Dual Hose: Enhances cooling efficiency by 20% and energy savings by 40%, using a unique hose-in-hose design to prevent heat leakage.
- Smart Wi-Fi Control: Manage your air conditioner remotely through the intuitive NetHome Plus app, compatible with Alexa and Google Home for voice commands.
- Three Operation Modes: Choose from cooling, dehumidifying, or fan modes with adjustable speeds and precise temperature control between 60°F and 86°F.
- High Dehumidification Capacity: Removes up to 87 pints of moisture daily, helping keep your indoor air comfortable and dry.
- Quiet & Sleek Design: Whisper-quiet operation paired with a modern white finish blends seamlessly into any room décor.
- Comprehensive Accessories: Includes an extendable dual exhaust hose, window installation kit, and washable air filter for easy maintenance.
Pros and Cons
- Pros:
- Efficient cooling for large rooms up to 600 sq. ft.
- Energy-saving inverter technology reduces electricity costs
- Remote control and voice assistant integration for convenience
- Highly effective dehumidifier function
- Easy setup with included window kit and hoses
- Quiet operation suitable for bedrooms or offices
- Cons:
- Relatively tall unit may require some space planning
- Premium price point compared to simpler portable ACs
- Wi-Fi setup may require basic smartphone skills
Performance & User Experience
Users consistently praise the Whynter ARC-1230WN for its robust cooling power and energy efficiency. The dual-hose design significantly improves air exchange, delivering faster and more consistent cooling without frequent overheating. The built-in dehumidifier works exceptionally well in humid climates, improving overall comfort. Thanks to its quiet operation, the unit is ideal for bedrooms, nurseries, and workspaces. Controlling the AC remotely via the NetHome Plus app or voice assistants adds a layer of convenience, enabling users to adjust settings before arriving home or without interrupting their routine.
Comparison with Similar Products
Compared to other popular models like the LG LP1419IVSM, the Whynter ARC-1230WN offers a higher BTU rating and dual-hose system, which generally results in better energy efficiency and faster cooling. While LG’s model also supports Wi-Fi, Whynter’s patented auto-drain function and superior dehumidification capacity give it an edge for those in hotter, more humid environments.
Who Is This Product For?
The Whynter Inverter Portable Air Conditioner is perfect for homeowners or renters who need powerful cooling in medium to large rooms without the hassle of permanent installation. It’s especially suited for tech-savvy users who appreciate smart controls and energy-conscious consumers looking to reduce electricity bills. Those living in humid climates will also benefit from its strong dehumidifier capabilities.
Final Verdict
The Whynter ARC-1230WN portable air conditioner combines impressive cooling capacity, intelligent inverter technology, and smart home integration to deliver outstanding all-around performance. Its quiet operation and efficient dehumidifier function make it a versatile choice for year-round comfort. While it requires some upfront investment and space, the benefits far outweigh these minor considerations.
If you’re searching for a reliable, feature-rich portable AC that keeps your space cool and comfortable without compromise, the Whynter Inverter Portable Air Conditioner is a smart buy.
Auertech 48″ 6500CFM Swamp Cooler Outdoor Review: Powerful Cooling for Large Spaces
When it comes to beating the heat in large indoor or outdoor areas, the Auertech 48″ 6500CFM Swamp Cooler stands out as an efficient, durable, and portable solution. Whether you need to cool your garage, warehouse, patio, or workshop, this evaporative air cooler offers impressive airflow combined with user-friendly features. In this review, we’ll explore why this swamp cooler is worth considering for anyone looking for powerful and cost-effective cooling.

Key Features
- Large 19-Gallon Water Tank & 8 Ice Packs: Provides extended cooling time with less frequent refills, and the included ice packs help significantly reduce temperatures for more refreshing airflow.
- Powerful 6500 CFM Airflow & 120° Oscillation: Moves a strong breeze with wind speed up to 35 ft/s, covering up to 1800 sq.ft., ideal for bigger spaces.
- Three Adjustable Speeds: Customize cooling intensity via three fan speeds to suit different environments and preferences.
- Durable Metal Frame & Portability: Built with a sturdy metal body, integrated side handles, and four caster wheels (two lockable) for easy mobility and stable placement.
- Simple Operation: Intuitive button panel controls with easy refill options through the top lid or front-bottom inlet make setup quick and hassle-free.
Pros and Cons
- Pros:
- Large water capacity reduces the frequency of refills.
- Ice packs enhance cooling effectiveness during hot days.
- Robust airflow suitable for large garages and commercial spaces.
- Adjustable speeds and wide oscillation for even air distribution.
- Sturdy metal build ensures longevity and durability.
- Portable design with lockable wheels adds convenience.
- Cons:
- Relatively bulky size may limit use in very small rooms.
- Evaporative cooling works best in dry climates, less effective in high humidity.
Performance & User Experience
The Auertech swamp cooler performs admirably in both indoor and outdoor settings. Users report substantial temperature drops thanks to the combination of a large water tank and ice packs, which boost the cooling effect on hot days. The powerful 6500 CFM airflow ensures rapid circulation, making it ideal for large spaces like workshops or warehouses.
Setting up the unit is straightforward—just fill the tank, add ice packs if desired, and turn it on. The 120° oscillation effectively distributes cool air throughout the area, while three fan speeds allow you to find the perfect breeze strength. The metal frame and smooth-rolling wheels make moving it effortless, even when fully loaded with water.
Comparison
Compared to similar swamp coolers such as the Honeywell CO60PM, which offers around 400 CFM and smaller tank capacity, the Auertech model delivers substantially higher airflow and longer run times. While the Honeywell is more compact and suited for smaller rooms, the Auertech is designed for larger, more demanding spaces, providing better value for those needing serious cooling power.
Who Is This Product For?
This swamp cooler is perfect for homeowners with large garages or patios, business owners managing warehouses or commercial kitchens, and event organizers hosting outdoor gatherings during warm weather. If you want an easy-to-move, high-capacity cooling solution that operates efficiently in dry climates, the Auertech 48″ swamp cooler fits the bill.
Final Verdict
The Auertech 48″ 6500CFM Swamp Cooler offers a compelling combination of powerful airflow, generous water capacity, and durability. Its versatile design, paired with three-speed settings and wide oscillation, ensures comfortable cooling in sizable areas without breaking the bank on electricity costs. While best suited for dry environments, it provides a refreshing alternative to traditional air conditioners for many applications.
If you’re looking for a reliable, portable evaporative cooler that can tackle large spaces efficiently, this model is worth serious consideration.
Uthfy 8979 CFM Swamp Cooler Review: Powerful Evaporative Cooling for Large Spaces
When the heat hits hard, finding an effective and affordable cooling solution can be a challenge—especially for large, open areas like garages, patios, and workshops. The Uthfy 8979 CFM Swamp Cooler promises to deliver industrial-strength cooling power with a host of user-friendly features. In this review, we’ll dive into its capabilities and help you decide if it’s the right choice for your cooling needs.

Key Features
- Impressive Cooling Power: Boasts a strong airflow of 8979 CFM at a speed of 48ft/s, capable of cooling spaces up to 1,800 sq.ft quickly and efficiently.
- Large 36-Gallon Water Tank: Equipped with a sizable tank that supports continuous water filling via a garden hose connection, ensuring uninterrupted cooling for extended periods.
- Enhanced Evaporative Cooling: Uses three-sided high-density cooling pads combined with five ice boxes to maximize evaporation and deliver cooler air.
- Wide Oscillation & Adjustable Louvers: Features 120° oscillation and manual louvers for broad and targeted airflow distribution.
- Durable & Portable Build: Constructed from sturdy electrostatic powder-coated metal and mounted on heavy-duty swivel wheels for easy mobility.
- Simple Controls: User-friendly independent buttons for fan speeds, cooling function, oscillation, and power make operation straightforward.
Pros and Cons
- Pros:
- Powerful airflow suitable for large indoor and outdoor spaces
- Massive water capacity with continuous refill option reduces downtime
- Energy-efficient evaporative cooling method
- Robust construction withstands tough environments
- Easy to maneuver with heavy-duty casters
- Cons:
- Requires regular water refilling if not connected to a hose
- Manual louvers may require occasional adjustment
- Larger footprint may need adequate space for placement
Performance & User Experience
Users report that the Uthfy swamp cooler excels at delivering cool, fresh air in large, open environments where traditional air conditioners may struggle or prove too costly. The combination of high airflow and the evaporative cooling effect lowers temperatures noticeably, making hot days more bearable in garages, patios, or even factories.
The continuous water supply option is a standout feature, preventing the hassle of frequent refills during long cooling sessions. Portability is another plus, as the caster wheels glide smoothly across floors, even over rough surfaces.
Comparison
Compared to other portable evaporative coolers like the Honeywell CO60PM, which offers around 430 CFM airflow, the Uthfy model is significantly more powerful, making it better suited for extensive spaces and industrial applications. However, smaller coolers may be more compact and easier to store if you don’t need to cool such large areas.
Who Is This Product For?
This swamp cooler is ideal for anyone who needs reliable, energy-efficient cooling in large, semi-open or open spaces. It suits homeowners with big patios or garages, workshop owners looking for cost-effective climate control, and event organizers who require portable outdoor cooling solutions. If you need a durable, heavy-duty cooler with high airflow, Uthfy’s model is a great pick.
Final Verdict
The Uthfy 8979 CFM Swamp Cooler is a robust and versatile evaporative cooling solution designed for large spaces. Its powerful airflow, massive water tank with continuous refill capability, and durable build make it a practical choice for both residential and commercial use. While it takes up some space and demands occasional water management, the overall performance and ease of use clearly outweigh these minor drawbacks. If you want to beat the heat without breaking the bank on energy costs, this cooler deserves serious consideration.
Buy Now and enjoy powerful, refreshing cool air wherever you need it!
14,000 BTU Portable Air Conditioner Review: Efficient Cooling for Large Spaces
When summer heat strikes, having a reliable air conditioner that cools quickly and quietly is essential. The 14,000 BTU Portable Air Conditioner from KoolSiln promises to deliver powerful cooling for rooms up to 700 sq.ft, combining modern features with energy efficiency. In this review, we’ll explore why this unit is worth considering for your home, office, or garage, and how it stacks up against similar models in the market.

Key Features
- Powerful Cooling Capacity: With 14,000 BTU, this portable AC rapidly cools spaces up to 700 sq.ft, dropping temperatures from 90°F to a comfortable 61°F in a short time.
- Eco-Friendly Refrigerant: Uses R32 refrigerant, which is more environmentally friendly and efficient, aligning with green cooling standards.
- Low Noise Operation: Noise levels as low as 48dB make this unit ideal for bedrooms or offices where silence matters.
- Auto-Evaporation Technology: Converts 80% of excess water into cool air, reducing the need to empty water tanks manually.
- Versatile 3-in-1 Functions: Easily switch between cooling, fan-only, and dehumidifier modes for year-round comfort.
- Convenient Remote Control & Easy Setup: Adjust settings via an LED display or remote control with a 23-foot range. Tool-free installation fits most vertical and horizontal windows.
- Mobility & Clean Air: Equipped with 360° wheels and dual handles for effortless movement, plus a removable air filter to maintain fresh air circulation.
Pros and Cons
- Pros:
- Fast and efficient cooling suitable for large rooms
- Quiet operation perfect for light sleepers
- Environmentally friendly refrigerant
- Auto-evaporation reduces maintenance hassle
- Multiple modes for flexible use
- Easy, drill-free installation
- Comes with 30-day money-back and 1-year warranty
- Cons:
- Requires window exhaust hose installation for optimal performance
- Best suited for rooms up to 700 sq.ft; may struggle in larger open areas
Performance & User Experience
Users report that this KoolSiln portable AC delivers rapid temperature drops, making hot rooms immediately comfortable. Its quiet operation is a standout feature, especially when used in bedrooms or workspaces. The 360° auto-evaporation technology minimizes interruptions from water drainage, letting you focus on your day or sleep peacefully through the night. Mobility is excellent thanks to smooth-rolling wheels and lightweight design. The remote control and LED display simplify adjusting settings, and the removable filter keeps the air fresh.
How Does It Compare?
Compared to similar portable AC units like the Whynter ARC-14S, this KoolSiln model offers comparable cooling power but edges ahead with quieter operation and eco-friendly refrigerant use. While the Whynter is known for durability, KoolSiln’s easy installation and auto-evaporation system provide a more hassle-free experience for users looking for convenience.
Who Is This Product For?
This 14,000 BTU portable air conditioner is perfect for anyone needing quick, efficient cooling in medium to large rooms such as living rooms, offices, garages, or basements. Light sleepers, eco-conscious buyers, and those seeking a multi-functional appliance (cooling, fan, dehumidifier) will find this unit especially appealing.
Final Verdict
The KoolSiln 14,000 BTU Portable Air Conditioner is a robust, user-friendly cooling solution that balances power, quiet operation, and energy efficiency. Its thoughtful features, including auto-evaporation and easy installation, make it stand out in the portable AC market. If you want a dependable air conditioner that cools fast without disturbing your peace, this unit deserves serious consideration.
Auertech 1800CFM Swamp Cooler Review: Efficient Cooling Made Easy
When the summer heat hits hard, having a reliable cooling solution becomes essential. The Auertech 1800CFM Swamp Cooler is designed to provide powerful, refreshing air without the complexity of traditional air conditioners. Whether you need to cool your living room, garage, or outdoor space, this versatile evaporative cooler promises portability, convenience, and effective performance. Let’s dive into what makes this cooler stand out and if it’s the right fit for your cooling needs.

Key Features
- Powerful Airflow: With an impressive 1800 CFM air volume and wind speeds reaching 25 ft/s, this cooler rapidly circulates cooled air to refresh your space.
- Generous Water Tank: The 5.3-gallon reservoir ensures extended cooling sessions without frequent refills.
- Portable & No Assembly Required: Equipped with 360° rolling casters and a sturdy side handle, moving this unit from indoors to outdoors is effortless, and it requires no complicated setup.
- Advanced Controls: The LED touch panel alongside a remote control offers convenient operation. The 12-hour timer and 120° oscillation help customize your cooling experience.
- Multiple Speeds & Cooling Modes: Choose between three fan speeds and modes (normal, natural, cooling) for tailored comfort.
- Ice Pack Boost: Includes 4 ice packs that, when frozen and added to the water tank, amplify cooling power for those extra-hot days.
Pros and Cons
Pros:
- Strong airflow covers large areas quickly
- Portable design allows easy relocation
- User-friendly controls with remote and touch panel
- Long-lasting water tank reduces refilling frequency
- Energy-efficient alternative to traditional AC units
- Ice packs enhance cooling without chemicals
Cons:
- Best suited for dry climates due to evaporative cooling principle
- Water tank requires regular refilling for continuous use
- Noise level may be noticeable on higher fan settings
Performance & User Experience
In real-world use, the Auertech swamp cooler delivers a noticeably cooler breeze than standard fans, making it an excellent choice for hot, dry environments. Users appreciate the wide-angle oscillation combined with adjustable shutters, which ensures even airflow distribution. The remote control and timer function add a layer of convenience, especially during nighttime use. Moving the cooler is hassle-free thanks to its smooth-rolling casters and ergonomic handle, making it easy to switch locations as needed. Adding frozen ice packs is a simple way to intensify the cooling effect, which is a feature many users find helpful on extremely hot days.
Comparison
Compared to other evaporative coolers like the Honeywell CO60PM, the Auertech stands out with its larger water tank and increased airflow capacity. While both models offer portability and multiple speeds, Auertech’s inclusion of ice packs and a 12-hour timer provide an edge in customization and prolonged cooling sessions. However, if you live in humid areas, a traditional air conditioner might be more effective since evaporative coolers work best in dry conditions.
Who Is This Product For?
This swamp cooler is ideal for anyone looking for an energy-efficient, portable cooling solution — perfect for:
- Homeowners needing flexible indoor/outdoor cooling
- People living in dry or moderately humid climates
- Individuals wanting a budget-friendly alternative to air conditioners
- Garage, patio, or workshop users seeking targeted cooling
Final Verdict
The Auertech 1800CFM Swamp Cooler offers a compelling blend of portability, powerful cooling, and ease of use. Its large water tank, remote control, and oscillation features make it a smart choice for those wanting to beat the heat without the expense and complexity of traditional AC units. While its efficiency dips in high humidity, it excels in dry climates and can transform your living or working space into a more comfortable environment. If you want a versatile, user-friendly swamp cooler that moves with you, the Auertech is worth considering.
MEPTY 8979CFM Swamp Cooler Review: Powerful and Efficient Cooling for Large Spaces
If you’re searching for an effective and energy-saving way to cool large indoor or outdoor areas, the MEPTY 8979CFM Swamp Cooler is definitely worth considering. Designed to tackle environments up to 2000+ square feet, this industrial-grade evaporative air cooler combines powerful airflow with durability and convenience. Whether you need cooling for a garage, workshop, patio, or commercial space, this unit promises robust performance without the high electricity costs of traditional AC units.

Key Features
– High Cooling Capacity: Equipped with three dense evaporative cooling pads and a strong fan motor, this cooler delivers an impressive 8979 CFM (cubic feet per minute) airflow. The included ice packs further chill the water, enhancing the cooling effect.
– Energy-Efficient Airflow: Unlike conventional swamp coolers, this model covers over 2000 sq. ft. with wide oscillation to distribute cool air evenly while consuming minimal energy.
– Durable Industrial-Grade Build: Featuring galvanized metal housing, this cooler is built to withstand tough environments such as garages, workshops, and outdoor spaces without wear or damage.
– Large 36-Gallon Water Tank with Continuous Refill: The sizable tank allows extended cooling sessions, and users can refill manually from the top or connect a garden hose for uninterrupted operation. A drainage port simplifies maintenance.
– Portability: Four heavy-duty caster wheels, including two locking ones, make moving this cooler between different areas hassle-free.
Pros and Cons
Pros:
– Powerful cooling capacity suitable for large areas
– Energy-saving compared to traditional air conditioners
– Durable steel construction built for harsh conditions
– Large water tank reduces refill frequency
– Continuous auto-fill option enhances convenience
– Easy to move with locking wheels for stability
Cons:
– Bulkier and heavier than smaller residential coolers
– Requires a nearby water source or manual refilling
– Best suited for dry climates, less effective in high humidity
Performance & User Experience
In real-world use, the MEPTY 8979CFM Swamp Cooler shines in spaces like garages, patios, and industrial workshops. Its high airflow rapidly lowers ambient temperatures, while the ice pack feature boosts cooling on especially hot days. Users appreciate the large water tank that minimizes interruptions and the continuous refill option, which is perfect for long shifts or outdoor events. Mobility is another plus, as the locking casters provide both easy transport and stability during operation. Some users note it’s bulkier than residential models, but that’s a reasonable tradeoff given its powerful performance and rugged build.
Comparison
Compared to other evaporative coolers like the Honeywell CO60PM, which offers around 2500 CFM suitable for smaller patios or rooms, the MEPTY stands out for its industrial-grade capacity and durability. While Honeywell’s model is lighter and more compact, MEPTY’s cooler handles larger spaces far more efficiently, making it ideal for commercial or semi-outdoor use.
Who Is This Product For?
This swamp cooler is perfect for:
– Business owners needing reliable cooling in workshops or warehouses
– Homeowners with large patios or outdoor entertainment spaces
– Anyone seeking an energy-efficient alternative to traditional AC units in dry environments
– People requiring portable cooling solutions with minimal maintenance interruptions
Final Verdict
The MEPTY 8979CFM Evaporative Cooler offers a powerful, durable, and energy-efficient cooling solution for large spaces and demanding environments. Its combination of high airflow, rugged construction, and convenient features like continuous water refill makes it a standout choice in the industrial and commercial cooling market. If you want a reliable cooler to tackle hot, dry conditions in garages, patios, or large indoor areas, this model delivers excellent value and performance.
Portable Swamp Cooler Air Conditioner Review: Stay Cool Effortlessly This Summer
If you’re searching for a reliable, energy-efficient way to beat the heat without the hassle of traditional air conditioners, the Portable Swamp Cooler Air Conditioner is an excellent option to consider. Combining powerful airflow, smart features, and easy portability, this 4-in-1 evaporative cooler offers a refreshing cooling experience perfect for homes, garages, and more. Let’s dive into what makes this air cooler stand out.

Key Features
- 8-Gallon Water Tank & 3800 CFM Airflow: The large water reservoir ensures longer cooling sessions without frequent refills, while the impressive 3800 cubic feet per minute airflow delivers powerful circulation to keep your space comfortable.
- 4 Ice Packs Included: Boost the cooling effect by adding ice packs in the tank, perfect for especially hot days.
- Dry-Burn Protection: Automatically shuts off the cooling function when the water level is low, protecting the pump and enhancing safety for indoor and outdoor use.
- Remote Control with Direction Detection: Operate the cooler from up to 33 feet away, with signal reception from multiple angles within 16 feet—no need to point the remote directly at the unit.
- Multiple Modes & Fan Speeds: Choose from Cooling, Normal, Natural, and Sleep modes combined with three fan speeds and adjustable airflow swing for customizable comfort.
- Ventless & Energy Efficient: No exhaust hose needed, easy to fill from top or bottom, and equipped with caster wheels for portability. Consumes only 80 watts, helping reduce your electricity bills.
Pros and Cons
Pros:
- High airflow capacity cools larger rooms quickly
- Large water tank supports extended use
- Energy-saving operation reduces utility expenses
- Remote control enhances convenience
- Safe dry-burn protection minimizes risks
- Simple setup with no hoses or venting required
- Multiple modes cater to different cooling needs
Cons:
- Best suited for dry climates; performance may drop in high humidity
- Water tank refills needed for continuous use
- Ice packs require freezing separately before use
Performance & User Experience
Users report that this swamp cooler provides refreshing, consistent airflow that noticeably cools rooms up to medium size, including bedrooms and garages. The large tank reduces the frequency of refills, while the ice packs enhance chill levels on sweltering days. The remote control works smoothly, allowing adjustments without getting up, and the swing function effectively distributes air throughout the room. Setup is straightforward, requiring no installation or complicated hoses, making it ideal for renters or those moving between spaces. Its quiet operation also makes it suitable for sleep environments.
Comparison
Compared to similar evaporative coolers like the Honeywell CO60PM, this model stands out with a larger water tank and higher airflow (3800 CFM vs. around 3200 CFM). Additionally, the advanced remote with direction detection and dry-burn protection offer superior user convenience and safety. While both units are energy efficient, this cooler’s multiple modes provide more customization options.
Who Is This Product For?
This portable swamp cooler is perfect for anyone looking to cool personal spaces efficiently without the cost or complexity of traditional air conditioning. It’s especially beneficial for:
- Homeowners wanting a supplemental cooling solution
- Garage or workshop users needing ventilation and cooling
- Renters who cannot install window AC units
- Eco-conscious buyers seeking energy-saving alternatives
- Those living in dry, hot climates who want affordable cooling
Final Verdict
The Portable Swamp Cooler Air Conditioner offers a compelling blend of powerful performance, convenience, and safety features in a sleek, portable design. Its large water tank, multiple cooling modes, and energy efficiency make it an excellent choice for keeping your indoor and semi-outdoor spaces comfortable during warmer months. While it excels in dry environments, remember that evaporative coolers generally perform best where humidity levels are lower. Overall, it’s a versatile, cost-effective cooling solution worth considering.
Buy Now and enjoy a cooler, more comfortable summer!
Buyer’s Guide: Choosing the Best Garage Air Conditioners for Well Insulated Garage
Upgrading a well insulated garage with the right cooling solution makes the space comfortable year-round without wasting energy. This buyer’s guide walks through the core factors to consider when shopping for the best garage air conditioners for well insulated garage spaces in 2025.
Materials and Durability
A garage environment can be harsher than a living room — dust, chemicals, and occasional bumps are common. Prioritize build quality:
– Housing: corrosion-resistant metals (galvanized steel) or UV-stable ABS plastics hold up best.
– Coils and tubing: copper coils with aluminum fins are common; look for anti-corrosion coatings or hydrophilic fins.
– Compressor type: scroll compressors tend to be more durable and quieter than basic rotary compressors.
– Seals and fasteners: stainless steel hardware and rubber gaskets resist rust and air leaks.
– Protective features: weatherproof outdoor condensers, sealed control panels, and reinforced casters (for portable units) extend life.
Performance and Efficiency
Well insulated garages need less raw cooling capacity, so focus on efficiency and precise control:
– BTU and cooling load: for a well insulated garage, calculate cooling BTUs based on square footage (typically 20–30 BTU per sq ft for well insulated spaces) and adjust for appliances, windows, or vehicles.
– EER/SEER and Energy Star ratings: higher ratings reduce operating costs; consider inverter-driven compressors for variable speed and better efficiency.
– Dehumidification: choose models that handle humidity well — important if the garage doubles as a workshop.
– Noise levels: look for units with low dB ratings, especially if you’ll be working nearby.
– Recovery and temperature control: accurate thermostats and quick recovery from heat spikes make the unit more comfortable and energy-efficient.
Size, Weight, and Portability
Decide how you’ll install and move the air conditioner:
– Types: window units, portable ACs, and ductless mini-splits are common for garages. Mini-splits offer best performance but need professional installation.
– Weight and form factor: portable units need sturdy casters and compact footprints; wall or window units require secure mounting points.
– Space constraints: measure door height and workspace layout to ensure the unit doesn’t obstruct movement.
– Ease of installation: plug-and-play portable and window units are DIY-friendly; mini-splits usually require certified installers and outdoor condenser placement.
Extra Features and Accessories
Extra bells and whistles can improve convenience and longevity:
– Controls: Wi‑Fi, programmable timers, and smart thermostats enable remote control and scheduling.
– Filtration: washable pre-filters, HEPA or carbon filters reduce dust and fumes from garage activities.
– Drainage and condensate handling: internal pumps or simple drain hoses are essential if you can’t gravity-drain.
– Heating/heat pump options: choose a model with heat mode for year-round use in temperate climates.
– Accessories: window kits, wall brackets, and vibration isolation pads simplify installation and reduce noise.
Price and Warranty
Recognize the balance between upfront cost and lifetime value:
– Price ranges: portable/window units are more affordable upfront; ductless mini-splits cost more but deliver superior efficiency and comfort.
– Operating costs: factor in electricity use, maintenance, and filter replacements — efficient units often save money long-term.
– Warranty: look for at least a 1–5 year parts warranty and longer compressor coverage (5–10 years). Check what voids warranties (improper installation, commercial use).
– Service availability: choose brands with good local service networks for repairs and replacement parts.
Choosing the best garage air conditioners for well insulated garage means matching size, efficiency, and durability to your specific use — a small, efficient mini-split or a high-quality portable could both be right depending on your priorities.
Take a look at the product list next to compare exact models, capacities, and real-world performance to find the ideal unit for your garage.
Frequently Asked Questions
FAQs about best garage air conditioners for well insulated garage
-
Q: What size air conditioner do I need for the best garage air conditioners for well insulated garage?
A: For a well insulated garage, size depends on square footage, ceiling height, and heat sources. A common guideline is 20–30 BTU per square foot for the best garage air conditioners for well insulated garage, increasing for high ceilings or equipment. Use manufacturer charts or an HVAC pro to confirm exact capacity. -
Q: Are window units or portable ACs better for a well insulated garage?
A: Both can work, but the best garage air conditioners for well insulated garage are often window or through-the-wall units for greater efficiency and continuous cooling. Portable ACs offer flexibility but usually have lower efficiency and exhaust losses. Consider ductless mini-splits if you want highest efficiency and quieter operation. -
Q: Is a ductless mini-split the best garage air conditioners for well insulated garage option?
A: Yes—ductless mini-splits frequently rank among the best garage air conditioners for well insulated garage because they provide efficient, zoned cooling, quiet operation, and dehumidification. Installation is more complex and costlier than window units, but long-term efficiency and temperature control often justify the investment. -
Q: How can I maximize efficiency of best garage air conditioners for well insulated garage?
A: Improve efficiency by sealing gaps, adding or upgrading insulation, using weatherstripping on doors, shading windows, installing a programmable thermostat, and properly sizing the unit. Regular maintenance—clean filters and coils—keeps the best garage air conditioners for well insulated garage running efficiently and extends lifespan. -
Q: Do I need special electrical work to install the best garage air conditioners for well insulated garage?
A: Possibly. Larger window units and mini-splits may require dedicated circuits, higher amperage breakers, or 240V power. The best garage air conditioners for well insulated garage should match your electrical capacity; have a licensed electrician inspect your panel and install required wiring to meet code and ensure safe operation.